Showing posts with label preschool art. Show all posts

Thursday, February 1, 2018

paint mixing...


After mixing up pink to paint our classroom chair, the children had mixing on their mind. We mixed up paint in a variety of ways for a number of different activities. After we discussed warm and cool colors, the children got to mix their own classroom paint. Some went for warm, most went for cool, and they mixed, mixed, mixed away to create their own paint. I think their favorite part was naming it. We will use this paint for the rest of the year, re-mixing when we need to. I can't wait!

Wednesday, January 31, 2018

self-portraits...

Sometimes our rainbow hair is seen in our minds eye....I think I may love self-portraits by the young even more than their elepehants.

Friday, May 19, 2017

paper plate lions

How cute are these lions? Our paper plate lions are a preschool craft project that gathers the kiddos into a group to work on skills such as cutting, glueing, and following instructions. I want to add that this is not an everyday deal that I do in my classroom. Most of the time we are mixing paint and creating our own art experiences. Sometimes we gather around so I can quickly assess who may need encouragment or who may need a new challenge. We never push and if a child has other plans or really does not want to do the project then that's okay. There a multitude of other ways to see where they are at. A craft such as this is cute and is a fun take home for parents to display. I mean, who wouldn't want a three-eyed lion on their fridge?


Paper plates are a fun and inexpensive resource for kiddo to create with. They are sturdy enough to hold ALL the paint, and have an interesting texture to them. Childre ncan cut them to create other tings, and they are happy to have paint, glue, crayon, marker, pencil, and even play dough spread over them.
Here we have a blue lion, a pink lions, a four-eyed lion, and a classic one or two in the mix. Once the paint dried, the kiddos added mouths or mustaches or design using the much coveted sharpie.
Sometimes though, I have to admit, it;s the paint messy brushes I swoon over.

Monday, May 8, 2017

mother's day brooches part 2

See what I mean? Gorgeous! I would totally wear one of these. I should make one for myself.
 
The bling came from my jewelry junk drawer. Craft store beads, sequins, woold balls, costume jewelry that had been dissasembled, you name it! I grabbed a couple of handfuls from the drawer and popped them into a bag for us to work from at school. I dumped the whole happy mess onto one of our trays and passed out empty applesauce/mini chobani containers for the kiddos to select what they wanted to add to their flower. Once they had their selections and I was ready for them, they came over to the hot melt glue table. Some of the children can handle the glue gun, others need/want help. We plopped a puddle of hot glue onto the center of the flower then we dumped our cup of happy onto the whole shebang. We ended up with some amazing bits of goodness. Before they added their bling, I had glued pinbacks to the backs of the flowers. When everything was ready, the children wrapped up their pins by rolling them in tissue paper and placing into a small bag. That day we also had a school function in the evening and it was so delightful to see all of the moms show up with their pins on!

Wednesday, May 3, 2017

mother's day brooches part 1


This year for Mother's Day I wanted to try something that could be worn outside of Mother's Day and landed on a painted floral pin.

I cut our a variety of flower shapes in different sizes with the idea that the children would select their pieces, smallest to largest...staple them together, then add paint before blinging them out with all sorts of sparkly goodness. This last unpainted flower was my sample. 
We used liquid watercolor to paint the flowers. I demonstrated how to wet the flower by submerging it into a tray of water. A few of the kiddos really got a kick out of that part, so they would paint their flower, submerge it to rinse it off, then paint again.

They came out even better than I had imagined! I think my favorites are of the flowers that got rinsed multiple times. The layers of color are so pretty. Stay tuned to see how they all turned out! I can't remember if I got photos of the children adding their bling or not but I do have final product pics!

Saturday, April 8, 2017

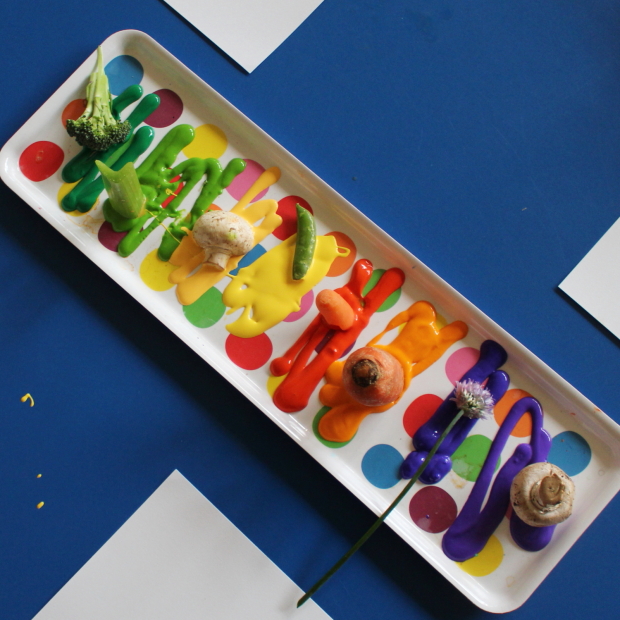
paint with veggies

veggies, and blossoms...chive blossoms... 
I tried my best to match paint to veggie colors but couldn't bear to add brown for the mushroom 
which seemed to be a favorite non-brush brush...

Monday, May 30, 2016

a window full of happy

I usually hang art up on the line to move it out of the way for new art that needs a flat surface for drying. This assortment of art waiting to go home was too happy not to photograph! We have our weather sun catchers on the window, our veggie prints hanging on the wire, our pool noodle sculptures on the shelf, and an be-glittered pine cone or two as well. Swoon!

Saturday, March 5, 2016

a wee little classroom happy

*weather inspire suncatchers
*blotto trolls
*easel painting
*pool noodle sculptures
*ice cream cones
*fun with weather pillows

**just a little splash of color in our classroom to brighten your day (and mine)!

Sunday, November 16, 2014

art inspired by press here

We spent a week exploring circles and primary colors for our week of Press Here by Hervé Tullet. As a part of our weekly journal art we made spotty collages on small sheets of paper that were six inches square. We began doing our art directly into our journals but I have found that the pages are too large for the children to focus on so we shrunk down the work surface for them to fill.

Kiddos used glue sticks to layer and stick their circles of choice to their paper. Some of our circles were punched at the art table by the kiddos themselves while others were prepunched by me from various scrapbook papers and some painted newspaper.