March 1st is Pig Day! That's me dressed up as Olivia. What a wonderful Pig Day today could be this being the year of the pig and all...I put together two lists for you, one for books and the other for fun so check them out and see if they give you any nifty ideas, I sure hope they do!
A long time ago at a pig party I held for Pig Day, I gathered an oddball assortment of all pink craft materials and asked the kidlets to make their own pigs. Now, I know there is no defining rule that says all pigs need to be pink and I told the kids this but just for fun this it what we did. I had just finished taking a children's art class and was overhwelmed with the pyschobabble of it all and decided to revamp my stories and art program to ensure all creations were open ended. I never modeled what the art should look like and I always encouraged creativity. If a kidlet asked for a supply that wasn't out and I had it, I brought it out. This pig party was the first of its kind and I was excited! You should have seen the pigs these kids made! We had fingerpainted pigs, artful pigs, playdough pigs, tissue paper pigs...it was AWESOME! The kids were all having a blast except for a three year old named Joey. He was mighty stressed out and frustrated as he attempted to draw his very first pig. I sat with him and dialogued and offered questions and encouragment and did everything I could to NOT show him how to draw a pig. I was working on fostering his atonomy which for Joey was a big deal because he had an older brother who was just old enough to dazzle him. Through his tears Joey told me he couldn't draw and was not good and I had a sad sad boy on my hands. I brought out all the pig books I read and we talked about how they were alike and different. I brought out a book with photographs of pigs so Joey could see how the illustrations were inspired. After a while he sniffled and was ready to try again. I asked him how many heads does a pig have? Three? Four? Two? Through his giggles he hollered "One!" "Well, there ya go," I said, "What shape is a pigs head?" and slowly but surely he started to draw. You should have seen the twinkle in his eye when he added two dots in a cirlce for the snout and by golly that boy drew the proudest pig of them all and I of course cried like the weepy girl that I am. I was ecstatic. I did it! He did it! We did it! I rode that high for weeks! Joey was so so so proud and excited to show his mom his pig and after that, his little self blossomed. He stepped out of his brother's shadow and created his own little world of wonder. It was always there but he just needed a push. The even cooler part was when his brother got all excited with him! I tell ya, I needed an entire box o' tissues!
Yeah, yeah, nice story lady but what does it mean? It means that while it is super easy to model an object or picture for your child, especially when they are pestering you to "draw me a monkey! draw me a monkey!" it is so much more joyful to give them the tools to create their own monkeys, pigs, trains, etc. Take a moment when you have it and sit down with them and talk it out. One thing I do when a child insists I draw or make art with them is I use spots of color and just paint strokes or dots and talk about the colors and what they remind me of. When I play with clay, I roll little balls. I stack them, I count them. All the while I dialogue about the texture, the scent, the colors and how they play into the child's world. You talk enough and soon they will talk with you and start creating their own objects! It is a thrilling experience as I am sure you all know.
Check out this nifty dad and his daughter's amazing artwork and see what this mom does with her kids' creations!

Showing posts with label scrumdilly-do. Show all posts
Showing posts with label scrumdilly-do. Show all posts
Thursday, March 1, 2007

Friday, February 23, 2007
It's Love Your Library Day!
Check out some of my favorite books about the library!
Wish, Change, Friend
Written by Ian Whybrow
Illustrated by Tiphanie Beeke
Published by Margaret McElderry (Simon & Schuster) 2002
Little Pig loved to read. She made a small list of some words that caught her eye and then magic hapenned. A simple sweet story with magical illustrations, you will want to gift this to everyone you know!

Goin' Someplace Special
Written by Patricia C. McKissack
Illustrated by Jerry Pinkney
Published by Atheneum/Anne Schwartz Books (Simon & Schuster) 2001
It's the 1950s and Louise is on her way to somewhere special. There is much that stands in her way but she is more than determined to get there! This tear jerker of a story tells of a time when our country ran by ridiculous laws and hateful ignorance couldstill produce excitement and smiles for a young girl whose very life was affected by those laws.
Book! Book! Book!
Written by Deborah Bruss
Illustrated by Tiphanie Beeke
Published by Arthur A. Levine books 2001
What happens when a gang of farm animals get bored? Why, they go to the library of course! Check it out!
Wish, Change, Friend
Written by Ian Whybrow
Illustrated by Tiphanie Beeke
Published by Margaret McElderry (Simon & Schuster) 2002
Little Pig loved to read. She made a small list of some words that caught her eye and then magic hapenned. A simple sweet story with magical illustrations, you will want to gift this to everyone you know!
Goin' Someplace Special
Written by Patricia C. McKissack
Illustrated by Jerry Pinkney
Published by Atheneum/Anne Schwartz Books (Simon & Schuster) 2001
It's the 1950s and Louise is on her way to somewhere special. There is much that stands in her way but she is more than determined to get there! This tear jerker of a story tells of a time when our country ran by ridiculous laws and hateful ignorance couldstill produce excitement and smiles for a young girl whose very life was affected by those laws.
Book! Book! Book!
Written by Deborah Bruss
Illustrated by Tiphanie Beeke
Published by Arthur A. Levine books 2001
What happens when a gang of farm animals get bored? Why, they go to the library of course! Check it out!
Sunday, February 18, 2007
Gung Hay Fat Choy!
Happy Chinese New Year!
It's the year of the golden pig and a very special year indeed! Read more about Chinese New Year here! In honor of the year of the pig and because I am at a loss for another activity to write about at the moment (I'm sorry, but Shrove tuesday has been sucking up my brain!) here are a couple of book recommendations!
Leon and Albertine Written & illustrated by Christine Davenier
Published by Scholastic 1998 (1st American Edition)
What better love story than the one of a pig in love with a chicken? Seriously sweet and perfectly charming this book is one of my top top favorites. The illustrations make we smile and even bring a wee tear to my eye when Leon finally tells Albertine he loves her. He does it his way and it is perfect!
Ruby's Wish
Written by Shirin Yim Bridges
Illustrated by Sophie Blackall
Published by Chronicle Books
Another beautiful tear jerker! This is the story of a young Chinese girl who wants nothing more than to go to school! It is New Year's and the lucky envelopes are being passed around and everyone is sharing their wishes, will Ruby's wish be granted? Based on the life of Shirin Yim's grandmother this story is a must have for any library!
Dim Sum for Everyone
Written & Illustrated by Grace Lin
Published by Dragonfly Books(Random House)
I love Grace Lin! She is fabulous, sweet and even keeps a blog! Her illustrations are delightful and her stories featuring an American Chinese family are familiar. While the culture may be different from yours (or not) the feelings of fun and excitement are much the same! Check out all of her books!
Other fun you can do:
*Pick up some blank paper lanterns and have yer kidlets paint, collage & decorate them.
*Try some green tea and almond or fortune cookies!
*Bake your own fortune cookies!
*Gather an assortment of anything and everything pink and make your own pink pigs. I've done this with kids and they have created three dimensional, tissue paper, painted, collaged & beglittered pigs! In honor of this New Year's make golden pigs!
*Play a game of Rock, Paper, Scissors
*Practice picking up small toys and charms with chopsticks
*Make your own Lucky Envelopes
*make some party cracker fireworks!
It's the year of the golden pig and a very special year indeed! Read more about Chinese New Year here! In honor of the year of the pig and because I am at a loss for another activity to write about at the moment (I'm sorry, but Shrove tuesday has been sucking up my brain!) here are a couple of book recommendations!
Leon and Albertine Written & illustrated by Christine Davenier
Published by Scholastic 1998 (1st American Edition)
What better love story than the one of a pig in love with a chicken? Seriously sweet and perfectly charming this book is one of my top top favorites. The illustrations make we smile and even bring a wee tear to my eye when Leon finally tells Albertine he loves her. He does it his way and it is perfect!
Ruby's Wish
Written by Shirin Yim Bridges
Illustrated by Sophie Blackall
Published by Chronicle Books
Another beautiful tear jerker! This is the story of a young Chinese girl who wants nothing more than to go to school! It is New Year's and the lucky envelopes are being passed around and everyone is sharing their wishes, will Ruby's wish be granted? Based on the life of Shirin Yim's grandmother this story is a must have for any library!
Dim Sum for Everyone
Written & Illustrated by Grace Lin
Published by Dragonfly Books(Random House)
I love Grace Lin! She is fabulous, sweet and even keeps a blog! Her illustrations are delightful and her stories featuring an American Chinese family are familiar. While the culture may be different from yours (or not) the feelings of fun and excitement are much the same! Check out all of her books!
Other fun you can do:
*Pick up some blank paper lanterns and have yer kidlets paint, collage & decorate them.
*Try some green tea and almond or fortune cookies!
*Bake your own fortune cookies!
*Gather an assortment of anything and everything pink and make your own pink pigs. I've done this with kids and they have created three dimensional, tissue paper, painted, collaged & beglittered pigs! In honor of this New Year's make golden pigs!
*Play a game of Rock, Paper, Scissors
*Practice picking up small toys and charms with chopsticks
*Make your own Lucky Envelopes
*make some party cracker fireworks!
Thursday, February 15, 2007
Make a paperbag book!

Just what you need to hold all those Valentines your kidlets made for you. Fun, easy and age adaptable, pull out some lunch baggies and go to town!
What you need:
*lunch sized paperbags
*scissors
*hole punch, paper punches
*crayons, markers, rubber stamps, ink, stickers and/or paint
*glue or gluestick
*sewing machine, brads or staples for binding
*anything else you can think of for decorating!
How to:
1. Gather your materials
2. Cut out the bottoms of 3 or more paper bags. This may be frustrating for younger kidlets so you may want to start the cut for them and of course do all the cutting for wee wee kidlets.
3. stack bags on top of each other and fold in half
4. Bind your book any way you like. There are oodles of options
5. Add a button closure or perhaps a flap to help keep the book closed
6. Decorate, decorate, decorate
7. Stuff and take a looksie!
You can use regular grocery bags to make BIG books to hold your kidlets artwork. You can also moit the removal of the bottom and bind the bags together to make a LONG book. Paperbag books make for great storage of flat collections. Make it a family tradition to make a book at the end of each summer to comemmorate the year. Make a book because it is fun...you don't really need a reason, do you?
Wednesday, February 14, 2007
lurvely crayons


More crayon melting fun:
Tuesday, February 13, 2007
Wee Valentine Trinket Boxes

What you need:
*empty matchboxes any size
*glue or gluestick
*paper, fabric or artwork
*markers, crayons and paint & paintbrush
*bits and baubles like buttons, stickers, charms & sweets
*scissors
Gather your supplies and have yer kidlets paint both parts of the matchbox. We paint the slipcover so that if and when you glue a paper or fabric cover the words and colors won;t show through. If your children are under 3 they can just paint away...larger matchboxes would be better. Set the boxes aside to dry:
If you are covering the matchbox with paper, you will need your gluestick, paper, a pencil & scissors. You can use other types of adhesive but a gluestick is the cleanest and most kid friendly kind. Take this moment to do a little math with your kidlets. Ask them how much paper do they think they will need to cover their box? Allow them to use the ruler to measure. A good age for ruler learning is 3 years old. I have witnessed it myself and it is pretty nifty:
Mark your paper, draw the line and cut away! Now you will have a strip to wrap around the box. Origami paper is a pretty good size for this project as you won't have to trim too much of the paper. Go to town with the gluestick and wrap it around the box:
Trim you excess paper but allow for a little bit of overlap. Once you have your box wrapped, set aside so the glue can dry. I use a clothespin to hold it down:
Now it is tme to decorate the outside. I wrapped a length of ribbon around my box using white craft glue that has been "painted" on the backside. Your kidlets may want to be-glitter their boxes are maybe adorn with stickers and other fun baubles:
While the outside of the box is drying, have your wee ones (over the age of 3) gather tiny materials to put inside. These can include candy conversation hearts, stickers, paper punched shapes, tiny toys and/or teeny drawings and secret messages:
See? Super fun! You can use these boxes for all sorts of niftiness! They can be tiny tooth catch-alls for the toothfairy, a secret place to hide notes of adoration for your children, a storage box for fortune cookie fortunes or a great gift box to present to friends and family when filled with other handmade goodies! Older kids and teens can get fancier by stitching away on scraps of fabric, ironing on to some sort of stabilizer so the threads won't unravel. I use Yes! paste on my fabric boxes so that there are no clumps or glue stains. Do you have a jar full of old mismatched costume jewelry? Use a pair of pliers to twist off clip on earring backs and glue onto the box with super strong E-6000! Younger kids can paint directly onto the boxes and or glue feathers and pom-pons to the outside or you can have them paint on regular paper and use strips of that for the outside. So many possibilities! If you decide to make one or two, send me a picture and I'll feature it right here on the Do!
Monday, February 12, 2007
RAK week & Valentine's countdown

The cool thing about making shortbread is that anyone can do it. Write out the recipe on large flash cards and you've got yourself a fun math lesson for yer kidlets! Another nifty thing is that since there is no egg in the dough, your wee ones can sneak all the dough they want and not get sick...well...relatively speaking. Shortbread can be VERY flakey so the more you handle the dough and the thinner you roll it out, the less crumbly it will get. My basic shortbread recipe is as follows:
*2 sticks of butter, softenned almost melted
*1 3/4 cups of powdered sugar
*2 cups flour
*1 tsp pure vanilla extract
*additional seasonings like cinnamon, ginger, black pepper to taste...go to town!
Mix the butter and sugar first, add the vanilla and spices next then the flour. Kidlets can do the first part with a wooden spoon and mix in the flour with CLEAN hands. It is like play dough, they will LOVE it! Once the dough is mixed, loosely wrap it in a floured dishtowel or wax paper and stick it in the fridge for about 10 minutes to firm up. Roll it out on a floured surface and let the fun begin!

Add your sprinkles and whatnot...you can even have yer kidlets "paint" the dough with food color if ya like and then "punch a hole in the center of the cookie using a straw.


Stay tuned all week for more lurvely crafts for you and yer wee ones!
Monday, February 5, 2007
Howdy Neighbor!
February 7th is "Wave all your Fingers at Your Neighbor" Day. I like to call it "Howdy Neighbor Day!" So, without further ado I bring to you an idea for a nifty gift to make for your neighbor or anyone else you feel the need to say "howdy" to. All craftiness here is do-able for kidlets of all ages and of course can be vamped up for us grown-ups.
Surprise your neighbor with a felty doorknob hanger. I used to make these for my teachers when I was a kid and yes this was in the seventies. I apologize for not having a template for you but I am not quite the computer savvy dilly girl but I'm sure you are all cafty enough to make up your own. I kind of winged mine but you may want to play around and draw a template first on scrap paper. Regular sized printer paper works well. I often use pages from magazines I'm tossing for patterns. Orientate your paper so that is it horizontal and mark out about 4 1/2 inches or so from one side and cut into a rectangle. From there you can create a keyhole shaped (or not) pattern for your felty piece. Have fun!
Gather your materials:
*felt
*scissors
*tacky glue or craft glue
*sequins, glitter, glitter glue and all that jazz
*paint and other collage-y fun
*needle & thread if yer kidlet can sew
limit your supplies to your kidlet's age and what they like best to use. Only put out what they can handle and of course you do all the scissor work if they are really young.
Cut out your basic shape and cut a small X into the top of your felt piece. This will be where you slip it over the doorknob. The remaining area is where your kids can go to town.
Decorate to your heart's content. Kids can paint, glue and/or sew their design on. Set aside to dry and sneak it onto your neighbor's frontdoor when they aren't looking with a little note about how they make your day better. Everyone loves a little love. Wouldn't you?
Surprise your neighbor with a felty doorknob hanger. I used to make these for my teachers when I was a kid and yes this was in the seventies. I apologize for not having a template for you but I am not quite the computer savvy dilly girl but I'm sure you are all cafty enough to make up your own. I kind of winged mine but you may want to play around and draw a template first on scrap paper. Regular sized printer paper works well. I often use pages from magazines I'm tossing for patterns. Orientate your paper so that is it horizontal and mark out about 4 1/2 inches or so from one side and cut into a rectangle. From there you can create a keyhole shaped (or not) pattern for your felty piece. Have fun!
Gather your materials:
*felt
*scissors
*tacky glue or craft glue
*sequins, glitter, glitter glue and all that jazz
*paint and other collage-y fun
*needle & thread if yer kidlet can sew
limit your supplies to your kidlet's age and what they like best to use. Only put out what they can handle and of course you do all the scissor work if they are really young.
Cut out your basic shape and cut a small X into the top of your felt piece. This will be where you slip it over the doorknob. The remaining area is where your kids can go to town.
Decorate to your heart's content. Kids can paint, glue and/or sew their design on. Set aside to dry and sneak it onto your neighbor's frontdoor when they aren't looking with a little note about how they make your day better. Everyone loves a little love. Wouldn't you?
Wednesday, January 31, 2007
Container painting!
It's fun! All ya need is:
*empty oatmeal container (or any container with a lid)
*paper that will fit inside your container
*tempera or acrylic paint
*roundish objects like superballs, corks, pom-pons, etc.
*tape
Gather your supplies. I let the kids choose 3 colors of paint. Acrylic has the best vibrancy unless you can get your hands on some Biocolor which is AWESOME! Tape paper to the inside of your container and add a couple of drops of paint...
Add your items, these will act as paintbrushes replace the lid and shake, shake, shake!
Dump out yer objects, wash to reuse or let them dry and be their own art.
Pull out the paper and let dry. I tape it to a window. Display on the fridge, frame or use as giftwrap. So much fun. Let your kidlets experiment with different types and sizes of objects and colors of paint. Have fun!
*empty oatmeal container (or any container with a lid)
*paper that will fit inside your container
*tempera or acrylic paint
*roundish objects like superballs, corks, pom-pons, etc.
*tape
Gather your supplies. I let the kids choose 3 colors of paint. Acrylic has the best vibrancy unless you can get your hands on some Biocolor which is AWESOME! Tape paper to the inside of your container and add a couple of drops of paint...
Add your items, these will act as paintbrushes replace the lid and shake, shake, shake!
Dump out yer objects, wash to reuse or let them dry and be their own art.
Pull out the paper and let dry. I tape it to a window. Display on the fridge, frame or use as giftwrap. So much fun. Let your kidlets experiment with different types and sizes of objects and colors of paint. Have fun!
Tuesday, January 30, 2007
Make a Time Capsule!
If you are an oatmeal family, chances are you often find yourself with an empty container or two. You have used those containers for storage, drums, buildings, and perhaps science projects, but have you made a time capsule yet? January is the perfect month for Time Capsule making. You and yer kidlets can accumulate some great good stuff from the previous year to tuck away and bury until next year. You can make it a family tradition! Here's a nifty how to guide with pictures and everything!

To start, you will need to gather your supplies:
*Empty oatmeal container
*glue, gluestick, and/or tape
*markers, crayons & paint
*nifty printed papers, giftwrap, constructionpaper or magazine pages
*ribbon & other collage items for that extra bit of pizazz

Remove the paper label from your oatmeal container and have your kidlets decorate the outside. If using regular sized paper, you will need two sheets to cover. Have the kids decorate the paper first before wrapping the container. Allow their creations to dry and make sure they know there may be overlap if using two sheets.

Now, while waiting for the niftiness to dry, gather your materials to tuck away inside. My container contains some of the following:
*nifty handmade postcards from friends
*a favorite xmas gift
*a favorite robot toy
*something I made
*a valentine I cherish
*a wee notebook full of swap notes I wrote to myself
The ideas are only limited to size. Include photographs, report cards, artwork, letters, stories, softies...you get the picture. Get old fashionned and make an audio tape of your kids talking aobut their favorite bits of the year or make a mix cd full of your favorite tunes from the year.See? Too many ideas!

Once your time Capsule is dry and ready, tuck all the goodies inside, add the date somewhere and seal. I used packing tape.

Now, where oh where are you going to "bury" it? YOu can tuck it away in a closet or the attic. If you choose to actually bury it, make sure you wrap it up in a plastic bag and have the kids create a map to the treasure!
Another spin on the Time Capsule for older kids would be to have them write themselves a letter about the year. Gather some smallish flat items like a favorite cd, artwork and photographs and put them into an envelope with their name on the front. Seal and hold onto it for 5 or more years. When they reach 16 or 18 or 21 mail them their time capsules for their birthdays. It is a gift more fun and precious than you can ever know!
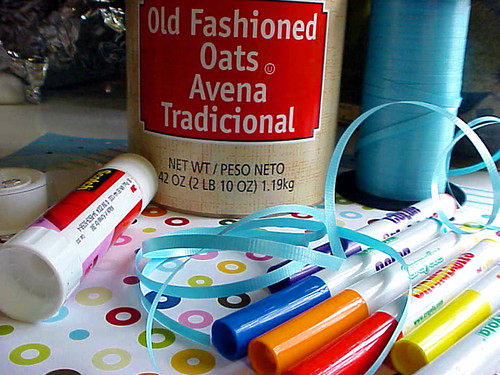
To start, you will need to gather your supplies:
*Empty oatmeal container
*glue, gluestick, and/or tape
*markers, crayons & paint
*nifty printed papers, giftwrap, constructionpaper or magazine pages
*ribbon & other collage items for that extra bit of pizazz

Remove the paper label from your oatmeal container and have your kidlets decorate the outside. If using regular sized paper, you will need two sheets to cover. Have the kids decorate the paper first before wrapping the container. Allow their creations to dry and make sure they know there may be overlap if using two sheets.

Now, while waiting for the niftiness to dry, gather your materials to tuck away inside. My container contains some of the following:
*nifty handmade postcards from friends
*a favorite xmas gift
*a favorite robot toy
*something I made
*a valentine I cherish
*a wee notebook full of swap notes I wrote to myself
The ideas are only limited to size. Include photographs, report cards, artwork, letters, stories, softies...you get the picture. Get old fashionned and make an audio tape of your kids talking aobut their favorite bits of the year or make a mix cd full of your favorite tunes from the year.See? Too many ideas!

Once your time Capsule is dry and ready, tuck all the goodies inside, add the date somewhere and seal. I used packing tape.

Now, where oh where are you going to "bury" it? YOu can tuck it away in a closet or the attic. If you choose to actually bury it, make sure you wrap it up in a plastic bag and have the kids create a map to the treasure!
Another spin on the Time Capsule for older kids would be to have them write themselves a letter about the year. Gather some smallish flat items like a favorite cd, artwork and photographs and put them into an envelope with their name on the front. Seal and hold onto it for 5 or more years. When they reach 16 or 18 or 21 mail them their time capsules for their birthdays. It is a gift more fun and precious than you can ever know!
Monday, January 29, 2007
Storytime
I guess I need to write a kids book about oatmeal since I cannot think of any but what I did come up with was this book which I adore adore adore!

Toot and Puddle: The New Friend
Written and Illustrated by Holly Hobbie
Published by Little Brown
A delightful story of friends and lesson learning. Everyone is excited when Daphne comes to play but she soon looses her appeal as she is so good at everything and knows it. Second best doesn't play well with her and she can be quite the snooty pig. Can you find the oatmeal reference? Enjoy all the other Toot & Puddle books also!
More Toot and Puddle fun here and here
Toot and Puddle: The New Friend
Written and Illustrated by Holly Hobbie
Published by Little Brown
A delightful story of friends and lesson learning. Everyone is excited when Daphne comes to play but she soon looses her appeal as she is so good at everything and knows it. Second best doesn't play well with her and she can be quite the snooty pig. Can you find the oatmeal reference? Enjoy all the other Toot & Puddle books also!
More Toot and Puddle fun here and here
Sunday, January 28, 2007
Oatmeal Month?

Funny how January can be so many different "months". In honor of Oatmeal Month I present to you some nifty oatmeal fun. For starters, why not read about why oatmeal is good for you? Then, tomorrow, whip up a batch of the best oatmeal ever and let yer kidlets add their own fruity fun to make it their own.
Perfect Oatmeal
*bring 1 3/4 cupcs slightly salted water to a boil
*add 1 cup uncooked oats
*turn heat down to low and simmer about 5 minutes
*add a couple o' dashes of cinnamon and stir, let simmer until water has evaporated
serve up into bowls and add yer toppers. My favorite is a squirt of honey, a dash of half n half, handful of blackberries, 1 tablespoon of granola & a dash of black pepper. Kidlets may like fresh fruit like bananas or strawberries. Dried fruit like raisins or apricots. Brown sugar and cooked apples, a drizzle of chocolate sauce and some mini marshmallows or a 1/4 cup of fruit cereal added for color are a few other ideas. Let yer kidlets create, they may come up with a favorite of yours!
Of course I have put together a kaboodle page for you. Check out some more oatmeal fun below:
Vegan Oatmeal Cookies
Awesome Oatmeal Cookies
Homemade Oatmeal Bath Soak
Kid Friendly Oatmeal Clay
Friday, January 26, 2007
It's Australia Day!

Hi folks! Today is Australia Day for all my friends down under! In honor of Australia Day I bring to you two book recommendations and some pretty pics on how to make your own fairy bread!
First up, one of my favorite stories by the ever fabulous redhead Mem Fox:
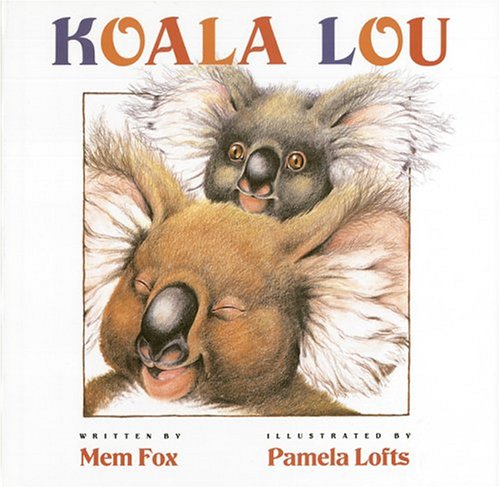
Written by Mem Fox
Illustrated by Pamela Lofts
Published by Voyager Books
Not really a tribute to Australia but an honorable mention is Alexander & the Terrible, Horrible, No Good, Very Bad Day!

Written by Judith Viorst
Illustrated by Ray Cruz
Published by Aladdin
For Fairy Bread you will need:
*soft white bread (though I prefer squaw bread)
*soft butter, margarine or clotted cream
*a bevy of sprinkles, jimmies and sugar
*large sized cookie cutters, about the size of a slice of bread
*a clean surface or splat mat
Maggie, the wee one who first introduced me to fairy bread likes to flatten her bread first by smashing it with her wee fists. So, after flattening you will want to butter your bread slice liberally. Give the kids plastic knives and they can do it all themselves! After buttering, have a go with all the sprinkles and such:
Cut out with yer cookie cutter...

...and, enjoy!

Happy Australia Day everyone!
Tuesday, January 23, 2007
Happy Pie Day!

Yup, today is pie day and while I am indeed baking a pie today, at some point, do not have any purdy pictures to share, nor do I have any of the Pie Books I recommended on my LISTMANIA list...drats! Wait, here is an okay pic of a tart I made, this could work! So, for now, take a gander over to my Kaboodle page for some linky-dinks for some pie crazy fun and here are a few ideas you could try for today with yer wee ones.
*Make some pie crust! Here's a vegan recipe that is easy and fun and yer kidlets can play with it like play dough. You can roll it out and they can make wee little pie crust cookies that would be yummy with jam. You can also make wee tarts by folding the dough up and over a dollop of jam or preserves...yummy!
*Have any aluminum pie pans? set them out with an assortment of collage materials and let yer wee ones make a wall hanging. Once everything is dry, add a picture hanger to the back and viola! Instant art!
*Make a shaving cream pie! Cover the play area with a splat mat or vinyl table cloth, pull out yer alluminum pie pans (you can also pick them up at the supermarket for cheap or save them from previous pie fun), add a little shaving cream and a few other washable toys and such and let them have a go at it. A Place of Our Own mentions using food color. I would recommend using Liquid Watercolor. A little goes a LONG LONG way and you can go in as a group to purchase all the colors and then split them up into smaller portions using the nancy bottles. Seriously, this stuff lasts a long time!
*If the weather permits, make mud pies! You can make them indoors if you are very brave but outdoor play is always a plus!
Okee doke, folks! That's all I have for now. Tomorrow, make sure you pay someone a compliment. After all, it is National Compliment Day!
Monday, January 22, 2007
Jek's Book Nook!

Believe it or not, January 20 was/is National Fancy Rat and Mouse Day. So, I know I still owe you some popcorn fun but until then, I offer up to you a recommended read of two very fine and "fancy" mice...
Bernelly and Harriet
Written and Illustrated by Elizabeth Dahlie
Published by Little, Brown
In this whimsical Country Mouse, City Mouse story, Bernelly, the countrified cutie is a flyfisher with style. While she prefers her quiet country life of fishing and gardening, she is a girl who loves a good pair of shoes. When she is in need of a new pair of boots, she rings up her dear fancy city cousin and proposes a visit. City mouse Harriet is a famous artist who loves to visit new places that will inspire her creativity. While the two discover that they prefer their own lives to each other's, they are fancy enough to see the whimsy in all that is around them! With beautiful illustrations you can't help but almost want to tear these pages out and frame them...almost!
Check out flickr-ette Cathy Gaubert for some whimsically fancy rats and more! She even has some squirrely goodness up. Cuz ya know, yesterday was Squirrel Appreciation Day! Oh and she has an etsy shop also!
And, just in case you are really into real fancy mice and rats. Here's some info on the critters!
Subscribe to:
Posts (Atom)