You can also do this ahead of time with blank paper and have your wee ones art them up before stuffing and puffing them...it's up to you.
What you need:
*your kidlets artwork or blank paper
*scissors
*white glue
*clothespins or paper clips
*recycled plastic bags, grocery, produce, bread, etc.
*paint, chalk, markers, etc. if using white paper.
*ribbon, string, yarn
*stapler or hole punch

scrumdilly-do it:
Gather up your supplies. Cut up your wee one's artwork into two or more equal sized squares. If you are using a large sheet of paper, fold it into quarters. If you are using white paper, do the same.

Cut out a heart shape through the layers of paper. You will be able to make half as many puffy hearts as their are cut shapes. Two hearts for each "pillow". If you are using blank paper, make your hearts as large as possible so allow your wee one's ample creating space. If you are having your wee ones repurpose their own artwork, you may want to draw a heart shaped template for them or if they are able to, have them draw their own template.

Apply glue to the "wrong" side of the repurposed heart just around the edges but leaving a two inch space. The opening will allow you to "stuff" your puffy hearts.


Place the companion heart, "right" side up on top of the glue-y heart, add paper clips or clothes pins to the edges to help secure. Set aside to dry.

Once dry, if you are using white paper, now is the time for your kidlets to art them up. If you are using paint, set the hearts aside to allow the paint to dry. If you are using repurposed art, it is time to "stuff" 'em up. Get your plastic bags and cut into manageable pieces. I used three quarters of a bread bag for one 8 inch heart. Squish 'em up and push into the opening.


Add glue to the edge to seal and use your clips to hold it closed.


Once dry, staple a ribbon, string or yarn loop to the top. You can also use a hole punch. You now have a nifty Valentine's Day ornament for your front door, door knob or what have you. Give a little love to your friends and family, Happy Heart Day!

 For those antsy times...
 scrumdilly-do it:
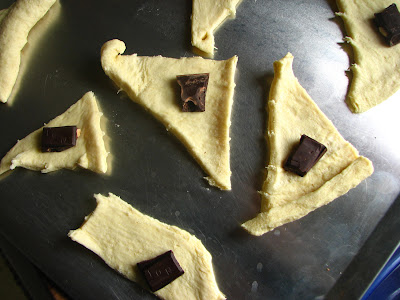
 Add a piece of chocolate bar or a few chocolate chips to center of triangle.
 Shape dough into crescent shapes and bake according to package directions.
 Let cool, place on a happy plate and sprinkle with a pinch of powdered sugar. Serve with a small glass of your preferred beverage and enjoy!


