Showing posts with label crafts for grown-ups. Show all posts

Wednesday, April 4, 2012

make a rainbow pillow

 Howdy folks! Going back to this post, I'm going to show some pics from how I made the rainbow pillow. I need to let you know that I am an awful crafter in the sense that I cut corners and don't measure. I am very imprecise. I just kinda do, so please forgive my lack of specifics and I hope you manage to whip up a happy rainbow yourself.

Materials
*large sheet of paper or newspaper
*pen or pencil
*scissors
*pins
*fabric scraps
*sewing machine
*fiber fill of choice

First, draw out a blunt rainbow shape on a large sheet of white paper (I taped two smaller sheets together to create a larger size). Cut it out.
 Find a red swatch of fabric a little larger than your template. Collect the next five colors in the rainbow making each swatch smaller than the one before it.
I pinned the red fabric to the pattern and cut it out. Eyeball your next color (orange) and cut out a similar shape only smaller than the red, continue until you have cut out remaining five colors. Stack them atop each other to see how your rainbow will look. Use scissors to trim and make any adjustments.
 Pin the orange fabric to the red and machine stitch using both a running stitch and a zig-zag. Repeat until all your fabric pieces are stitched together, making a happy rainbow.

Flip the whole shebang over and pin it to the backing fabric (mine was cut into a large rectangle). Take over to the machine and stitch the two pieces together leaving a channel open for turning right-side out and stuffing.
Trim fabric and turn right side out. Settle into a comfy space with a bag of fiber-fill and get to stuffing. Handstitch the opening closed and now your pillow is ready to go!

If you need any help, feel free to ask me anything, I'm here for ya!

**Oh my, I must have been super tired when I wrote out this post. I just remembered that I actually did NOT simply eyeball the pieces as I cut them, rather I CUT the actual PATTERN with each subsequent color.  It's even easier than eyeballing. Seriously easy. I can't believe I completely blanked. Zoinks!

Monday, April 2, 2012

make a wee easter egg pillow

 This small project is for you to make for your kiddo if your kiddo is not stitch-friendly. Wip up a couple of these for your kiddo's basket and they can decorate them themselves with markers. Fill em with rice or beans instead of fiber-fill and they become cool packs for bumps and bruises.

Materials
*empty easter candy boxes
*small fabric scraps
*paper & pencil
*pins
*sewing machine 
*needle and thread
*scissors
*markers or paints for your kiddo
Gather up an assortment of small Easter candy boxes. My boxes came from the dollar store and are a smidge smaller than your traditional candy hearts boxes. Create an egg shaped template that is smaller than your box. Cut out with scissors. To more involve your child, you may cut out a small rectangle that matches the front dimension of your box, hand your kiddo a pencil and have them draw their own egg shape. To turn it into a math exercise, hand your kiddo a ruler and let them measure the box to create their own rectangle.
 Pin template to two small fabric scraps making sure at least one of your scraps is blank, right sides facin in.*
 
Stitch around template leaving a small open space for turning out and stuffing. Remove pins and template and cut out. *If you or your child is hand-stitching the egg, cut out the shape first then use a whip stitch in a contrasting thread to anchor pieces together. Don't forget to leave a small opening for stuffing.
 
Turn right side out and stuff. Use dried beans or rice to create cold packs or add a little lavender for some added sweetness. Hand stitch the opening closed and tuck into candy box.
 
 
When your kiddo opens the box, they can decorate their Easter eggs with markers and or paints. Happy Easter!

Saturday, March 31, 2012

the weather report

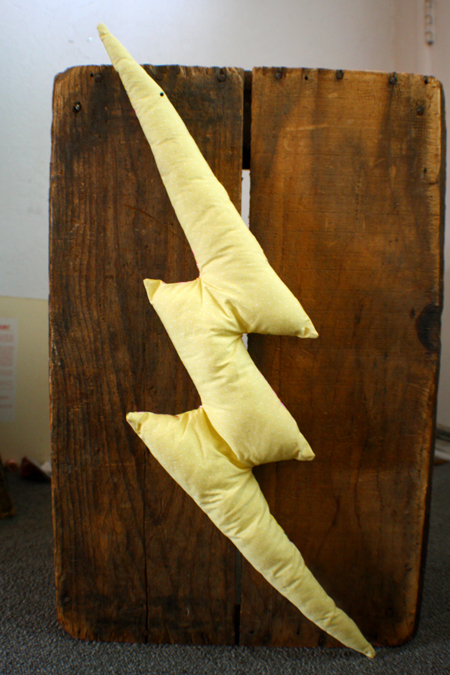
 We've been studying weather at the preschool. To add a little fun, I whipped up some weather influenced pillows to add to this week's outdoor reading corner. I thought the rainbow would be the most popular but it turns out the lightening bolt was a zinger!


I used the fabric I had on hand and drew up some paper templates on large sheets of white paper I taped together. I stitched up smaller sheets of fabric to create larger sheets to fit the templates. Pieces were layered right-sides in and then stitched all the way around save for a three inch channel that allowed me to turn the whole thing right-side out and stuff. I then hand-stitched the opening shut after lightly stuffing with poly-fiberfill. The rainbow was a whole other process, I 'll post that soon. Happy weather!