
You're stranded at home, the baby's asleep and your preschooler begins the "I'm Bored!" chant. Here's a new way with play dough or homemade play clay (checkout the
CRAFTzine blog for a perfect recipe.) that will maybe, just maybe bust those boredom blues. Have a batch of homemade play dough in the fridge that might possibly be getting too old? Use it as an anchor for an assortment of household objects and make these nifty crayon rubbings.
You will need:
*play clay
*rolling pin
*semi-flat found objects like washers, bottle caps, etc.
*crayons without their wrappers
*paper (scrap paper is perfect)
scrumdilly-do it!
Set up your work area with splat mat, dough, crayons, paper and found objects.

Roll out your clay/dough dough to a good sized flat blob.

Have your wee ones play with their found objects by pressing them into the clay. Your found objects should be no thicker than the dough you rolled out.

When they are happy with their arrangement, place a sheet of paper over the art (we used the backside of printed paper we no longer needed) and tape at the corners to anchor it down.

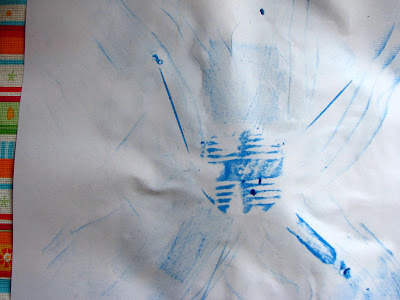
Using the flat side of the crayon, have your kidlet rub the crayon back and forth over the paper to create a rubbing. Use more than one color for variety.

You can even arrange your objects to look like a creature or robot. Cut cardboard from old food boxes into robot like shapes for a robot making factory. Use up all your scrap paper and make your own Robot Parade. Even better, play
this song while you're at it!

Stay tuned for another take on this method...I've got two more ways with play clay that are easy to do in a pinch!


 You're stranded at home, the baby's asleep and your preschooler begins the "I'm Bored!" chant. Here's a new way with play dough or homemade play clay (checkout the CRAFTzine blog for a perfect recipe.) that will maybe, just maybe bust those boredom blues. Have a batch of homemade play dough in the fridge that might possibly be getting too old? Use it as an anchor for an assortment of household objects and make these nifty crayon rubbings.
 Roll out your clay/dough dough to a good sized flat blob.
 Have your wee ones play with their found objects by pressing them into the clay. Your found objects should be no thicker than the dough you rolled out.
 When they are happy with their arrangement, place a sheet of paper over the art (we used the backside of printed paper we no longer needed) and tape at the corners to anchor it down.
 Using the flat side of the crayon, have your kidlet rub the crayon back and forth over the paper to create a rubbing. Use more than one color for variety.
 You can even arrange your objects to look like a creature or robot. Cut cardboard from old food boxes into robot like shapes for a robot making factory. Use up all your scrap paper and make your own Robot Parade. Even better, play this song while you're at it!

 If yer a frugal crafty type like myself. You may have an assortment of empty spools laying about. Even the non-wood variety are hard to toss. Turn them into printing tools for your kidlets and watch them make some nifty snowflakes!
  scrumdilly-do it!
 Add one empty spool for each paint color and let 'em at it! They can print willy-nilly or in ap attern. It is up to your wee ones.
 While the paint is still wet, have your kidlets sprinkle (dump) salt and/or glitter on top. Set aside to dry and shake off the excess.

