Showing posts with label alternative paintbrushes. Show all posts

Thursday, October 12, 2017

Tuesday, September 26, 2017

and then we painted with cars...

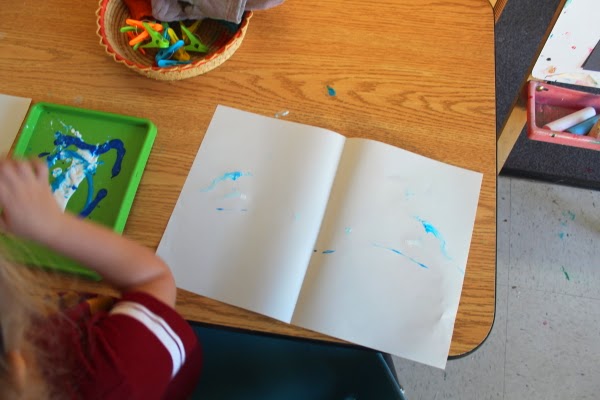
Sometimes we set this up as an invitation to paint, sometimes we do it as a group. This time, we set it up as a group and used our primary colors to see if mixing would happen. We pulled all of the chairs away from the table and gave each kiddo a piece of paper that they began with and carried with them as they moved around the table to the next tray of paint. There is a lot of language when we do this as the children laugh and communicate what the cars are doing on their paper. I love our group projects, I feel they serve a position in our classroom community. That said, we do not always do large group projects like this. In the beginning of the year we do more of them to help guide the children in how to use the materials. Once the children begin to engage with the materials on their own, we step back and watch to see where we can next guide their creativity.

Wednesday, May 24, 2017

classroom canvases

One of the ways I build community in the classroom is through our classroom canvases. Each child gets a flat canvas to create art on but with a twist. The owner of the canvas gets to choose the colors and paints the base however they wish.

We use acrylic paints for our canvases which elevate the process for the children. I keep the acrylics in a cardboard suitcase so they know something fun is afloat when it makes an appearance. Once the original coat is dry, the owner of the canvas selects a new color or two for a classmate to use on their canvas. For me, the fun part is switching out the tools the children use. I place a variety of tools on a tray and the painter selects which one they wish to use. This helps to keep the canvas from getting muddy while alerting the child that this is mindful work.

Some of the tools we've used are strawberry baskets, q-tips, pieces of cardboard, dollar store massage rollers, tp tubes, cups, sponges, toys, the bottoms of cups, toothbrushes, and our fingers.
The evolution of each canvas is pretty magical. We paint on them throughout the year so some may have layers and layers on them, while others might not.

Saturday, September 27, 2014

painting with {rubber} ducks

For our week of Over in the Meadow we explored a variety of critters that may live in a meadow, listened to the song by Bob Neary, and read a few different versions of the story.  Each day we talked about which animals might live in a meadow and which of those were our favorites (frogs appear to often be a crowd-pleaser). One of our centers involved painting with an assortment of rubber ducks, frogs, and fish. The children really enjoyed exploring these materials in this way.
The scrub brushes were purchased from The Dollar Tree, while the other items were already on hand in the classroom. Next year I hope to acquire a broader collection. The best part of it all? Washing off the paint with super sudsy water!

Saturday, May 17, 2014

Going on a Bear Hunt: painting with natural elements

The children in my classroom really love the story We're Going on a Bear Hunt. We often reenact it throughout the week when someone is reminded of the swishy-swashy of traveling through grass or the stumble-trip of hiking through the storybook forest. We talk about natural elements around the classroom and in our community. While we do not really have snow, we do have creeks, the ocean, tiny rivers, forests and tall grass so all of the elements in the story are very familiar to the children. One of the activities I had set up at our easel was painting with sticks, leaves, grass, and flowers. We decided to use these paintbrushes to create our grass and/or landscapes so the children, after discussing the colors found in the tall, tall grass and dark forests, decided on green and yellow.

There were many returns to the easel. Some children used each paintbrush on a separate part of their painting, others mixed it up while others focused on just one brush. The focus and attention they exhibited was a treat to behold and extended to the children to who prefer to roll and fold up their very wet and paint-sticky paintings. So much investigation going on!

Tuesday, March 25, 2014

three kittens: painting with yarn

Here is another art table set up we had during our week of The Three Little Kittens. Painting with yarn!
 
Large paper was set out with a tray and some paint. The children selected the paint colors as a group before getting down to business. I explained that instead of paintbrushes we would be using yarn. I did not go into anymore detail than that. I did however, fold the paper in half to see what the children would do and/or say about the crease.
 
Funnily enough, no one said anything about the crease. They just sat down and got to work. Some did one dribble of yarn while others switched to mittens or just popped their hands into the paint.
We had done some symmetrical pictures before in class so the children knew about the painting on one side aspect of this project. In different art books they would suggest you place your yarn on the paper, fold it in half then gently pull the paint ladden piece of yarn out to create a squiggle pattern. Some of the children popped their yarn down onto the paper, folded, then smoothed their hands over the paper. Later in the day, I asked what would happen if we pulled the string out before unfolding the paper? One enterprising young one tried it and this is what happened.

Friday, March 21, 2014

the three little kittens: painting with mittens

 
We had two weeks of mitten fun in our classroom. It was all mittens all the time. Our mitten painting accompanied The Three Little Kittens and after they mittens were all paint-goopy, the kiddos got to wash them in a tub of soapy water.
I made our mittens out of a sweatshirt I picked up from the thrift for $2. I used the patterns we made from when we stitched our own mittens and zipped these through my sewing machine. These will get double play next year when we read The Mitten. I also made some from my very favorite now-retired orange muppet sweater...sigh. I set up the table with paper, trays for paint, and a shallow basket full of mittens so that the children could pick out the mitten they wanted to use.
 
After the children chose their paint colors they got work. There was a lot of investigation even before the first print was made.
 
Some made prints across their paper (after asking for more paint). They would comment on how the colors looked on the mitten versus their paper and they would tell me how their hands felt warm in the mitten but cool when the paint seeped through. We talked about how two weeks before we used mittens in our water tray when there were big blocks of ice in it and how at first our hands were protected and warm but then the water seeped in and our hands got cold.
 
It was really fun to watch the variety of techniques the children used for this project. Some chose just one or two colors to start but kept adding more as they painted. Some made prints while other used their mitten hands as paint brushes swiping and dragging the paint across their paper. They had a lot of fun and took these home right away as well so sadly I have no finished photos.

Saturday, December 21, 2013

painting with holiday bows


We painted with our bow brushes using our tempera paints on fingerpaint paper. The glossiness of the paper gave our paintings a fun bit of shine. The children enjoyed painting with our bow brushes and took it upon themselves not to mix the paint up. I had done this before years ago with the children dipping their bows in paint. I wish I had thought of gluing them to craft sticks but then again it was so long ago you needed to save your popsicle sticks if you wanted some. So happy I found the idea and this pin


Thursday, April 5, 2012

painting with eggs

 plastic eggs that is...
At first they shook their eggs.
Then they cracked them open.
Some tilted their papers this way and that way while others dove right in.
I liked the painty drippy plastic eggs almost as much as their artwork.

Tuesday, March 1, 2011

All but the kitchen sink...

St. Patrick's Day is just around the corner and there are oodles of projects you can do simply by using green. Check out what Rachelle from Tinker Lab thought up with a batch o green paint, paper and a sink mat. For instructions and nifty how-to hop on over to Tinker Lab. Thanks for sharing, Rachelle!

Sunday, June 13, 2010

Flowery Thank-Yous


I promised jessica I would get something up over here every now and then whilst she's away on the Big Trip.

School is winding down, so I am hopeful that I can keep my promise.

In the mean time, I'll send you over here to see how Zaza and I borrowed a craft idea from elsewhere, and in so doing turned a post-birthday chore into something kinda crookedly beautiful...

Friday, July 3, 2009

last minute fireworks painting

Here's a fun and slightly messy fireworks painting project for your kidlets. This one is definitely for the outdoors. Beware of fits and giggles!

You will need:
*2 or more small bouncy balls.
*at least 1 pair of old tights or hose
*splat mat
*scissors
*white paper
*red and blue paint (or any other two colors you prefer)
*containers for the paint
*water to thin paint
*mess friendly clothes and work area

scrumdilly-do it!
Set up your work area by filling your containers with paint and water. I used a little too much water for mine so the colors are quite muted. Liquid watercolor or tempera is fine for this. You could even use food color and water if you wanted to.Have your kidlet cut the legs off the tights near the top where the legs meet.Pop a ball, I used large super balls, into each leg and shake it down to the toe. Add a knot just above the ball to ensure it stays in place.Toss your new paintbrushes into your pain mixture and let them soak up a bit of paint.When your tot is ready, pull out a "brush" and WHACK it onto the paper. It will make satisfying THWACK and splatter as it hits. Make sure your kidlet knows to only bounce their new brush onto the paper and NOT at their sibling or friend. Have your kidlet try different techniques. Try dropping the ball directly onto the paper or dragging it across for lines. Whatever you do, the more colors your tots use, the more fireworks-y their pictures will appear.Have fun and don't say I didn't warn ya!