Showing posts with label valentine. Show all posts

Sunday, February 23, 2014

valentine cloud dough fun

 
A few weeks ago we had cocoa cloud dough in the classroom. I need to get those photos up! For Valentine Week I added a box of strawberry cake mix to the dough and a side dish of crushed cocoa husks along with various tools such as a flour sifter, measuring cups, wooden spoons, and a wee mortar and pestle.We also had hearts aplenty with small jewels and heart shaped containers.
 
 
The children loved the scent of the cloud dough as did the parents. Some scooped up the dough and spooned into our muffin pan. I found the silicone heart-shaped muffin pan at the thrift outlet for fifty-cents!


I only had one sifter and it was a popular tool. The cocoa husks got dumped into the dough and then the children tried to sift the all of the flour away from the husks. They noticed that their sifted dough was more dusty than the rest and kept calling it their chocolate dust. There was also a lot of husk crushing going on. Due to having only a single flour sifter, we had to get creative...
 
 
Which brings me to the mortar and pestle. The children really liked the crushing aspect and feel for the tools. Using a tiny one I found at World Market they would go at it for all of their exploration time. A lot of focus and work was happening. As well as all those nifty motor skills we like to talk abut. If you have never tried cocoa hulls in your sensory bin, I recommend it! The scent and texture is thoroughly satisfying and when all is said and done, it makes for a great ground covering or mulch in your garden or you can whip up a wee "cocoa" bunny and add a handful to the stuffing for authenticity. Source it from a local organic supplier and make sure to dry it out in the sun before sealing it up in a bin or bag to prevent molding. Cocoa hulls are harmful to dogs and if you have a child under the age of three I would not use hulls unless supervised (as all children should be).

Saturday, February 22, 2014

valentine play dough fun

 
I always have play dough available in the classroom. Often, we make it in the morning using a no cook recipe that is mostly made up as I never write things down. It has all the usual suspects;  2 cups flour, 1 cup salt, 1/4 cup corn starch (makes it so smooth!), 2 T cream of tartar, 2 T oil, liquid watercolor, and about 1/2 cup of hot water. The measurements are not exactly exact when you let three-year-olds take the lead but it is always fun and it is always a learning process. While I would have delighted in making up a batch of pink dough for Valentine's Day, we had a perfectly good batch of aqua colored dough that came about when the children mixed their blue dough and their green dough together. Add a bunch of heart shapes and cookie cutters and voila! Valentine's Dough!
  
Perfectly good save for the fact that it kept getting more and more gooey week by week (hey, it's still good!).  I think maybe someone was experimenting with water and well since school is always a learning process, I added a cup of flour to the table for the children to knead into the dough. We call it "working the dough". I love hearing their little voices call out that they are working the dough!
  
 
This was the first time I added basic flour to the table. Some of the children spent more time playing with the flour than the dough. Across the table I even had a batch of Valentine's Day cloud dough available but I think the sensation of the flour on the table was a new and unique experience. I remember how much I loved the feeling of flour on my hands when I helped my mother bake and so we added a bit more flour just because.
  
One of the children discovered she could make heart shapes in the flour with a cookie cutter. She also discovered she could scrape and scoop the flour with the cutter as well. It was all very exciting!
 
Every time I passed the dough table I was greeted with a new sight. One of my kiddos rolled the dough out as thin as possible and stuck these festive picks into it. They kept falling over and it took a few tries for him to realize the dough needed to be a a tad bit thicker. All that flour made the dough super fluffy and not crumbly. Putting it away at the end of the day found me joyfully rolling it into balls and squishing it into the bag, you know...to dust it off, of course! 

Friday, February 21, 2014

special delivery {scissors work}


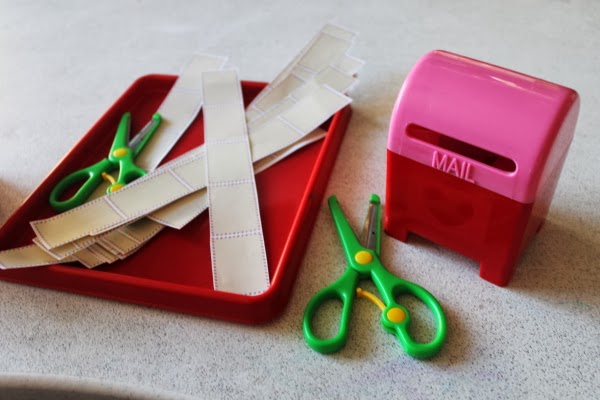
For our week of Valentines I created a file of airmail envelopes for the children to cut and mail. These threes love scissors work and the mail boxes were an added bonus. We also created a post office in the classroom. More photos coming soon. If you would like to print out your own air mail strips for your classroom, click here. Enjoy!

Monday, February 6, 2012

be my valentine: irresistable

 Here is a lovely watercolor, crayon resist you and your kiddos can whip up in no time. All you need is painter's tape, heavy paper (water color paper works best), a white crayon or oil pastel and watercolors.
Mask out a square with your painter's tape. Have your kiddo cover their paper with drawn hearts using the white crayon or draw some hearts for your kiddo. Have your kiddo paint on water to dampen the paper and let them go to town with their paint. Stick with one color or limit your kiddo's palette to two or three that wil mix happily when they run into each other. 
Set aside to dry, remove tape and hang!

Thursday, February 2, 2012

be my valentine: i only have eyes for you

If you've got glue and googly eyes, yer good to go. Hand your kiddo some markers or crayons first to decorate their blank cards, have them sign the back then let them get all glue happy. Set aside to dry and have fun!


Wednesday, February 1, 2012

be my valentine: blended strawberry milk

This is a super tasty blended drink that I actually enjoy more than a milkshake! This recipe blends up two small servings and has very little added sugar. You can sweeten it up if you like it is pretty adaptable.

Ingredients:
*1/2 cup milk
*1/2 cup frozen strawberries
*1/2 teaspoon vanilla or 2 tablespoons Ovaltine
*blender
*whipped cream and sprinkles (optional)
 
 
Blend milk and strawberries in a blender until smooth. For a vanilla blend, add vanilla and a smidge of sugar if you like. For chocolate, add the Ovaltine. Pour into fancy glasses and top with a dollop of whipped cream. Add a smattering of sprinkles, pop a happy straw into the mix and enjoy!

Tuesday, January 31, 2012

be my valentine: you drive me wild

 Here is a fun valentine project that will allow your kiddos to do a little drawing, a little cutting and a little gluing. Have fun!

Materials:
*small pieces of cardstock, atc sized or larger
*printed/origami paper
*pencil/markers
*scissors
*glue stick
*white glue
*buttons

Cut a piece of origami paper down to the same size as your card stock. I traced around my card stock instead of cutting. Flip over to the back and have your kiddo draw a car shape without wheels. Use your scissors to cut out the car, have your kiddo do the cutting if they can. 

Have your kiddo write their valentine message on one side of the cardstock with marker or colored pencils. "Valentine, you drive me wild" "is a kitschy as you can get here.
 Slather the back of the car shape with glue stick and stick to the other side of the cardstock. Add a glue blob to the back of a button and plop it down for a tire, repeat for a second tire and set aside to dry.
Once dry, have your kiddo add detail to their car using markers if they wish. You can also have your kiddo stitch their button wheels on with embroidery thread. You can use a small hole punch to punch two holes into the card stock where your kiddo wants the button to be.
 Beep! Beep!

Friday, January 27, 2012

be my valentine: nuts for you

 Greetings happy doers! Today's happy valentine is super easy to make with plenty of room for variation, with the added benefit of being allergy free! Have fun! 

Materials:
*small atc sized cards or index cards cut in half
*ink pad
*pens
*glue
*small googly eyes 7mm or smaller
*origami/construction paper
*glue stick
*scissors, pinking shears and/or border punch
  Grab your materials and have your kiddo gently press her/his thumb into the ink pad and smoosh it onto the paper near the top. Flip the card over so the thumb print is at the bottom and add another print above and slightly touching the first print. It should sort of look like a peanut.
Have your kiddo draw a series of diagonal lines across their soon-to-be peanut and then more across them to create a peanutty texture. Glue on your googly eyes with a small dab of white glue and add a valentine message. Your kiddo can use hand write their message, draw hearts or use alphabet/heart stamps to embellish. 
Grab a sheet of origami or construction paper and cut a rectangle about half an inch larger around than your valentine card. Use a pair of pinking shears to trim the rectangle or use a border punch to pretty it up. Use a glue stick to flue the valentine to the punched paper. My pics show the gluing first then the punching but it was tricky to make sure to NOT punch through the valentine, so I would advise punching the paper before the gluing. Don't forget to have your kiddo sign the back of their card!
 
 
You can also have your kiddo make one fingerprint peanut sans eyes. Add your lines and scan the image into your computer. Print out larger images to your liking and have your kiddo add eyes and sign. Or, you can make the card on a thinner weight paper that you then machine-stitch to a kiddo painted background card. See? So many options! Happy almost-heart day!