Wednesday, July 31, 2013

Sewing School 2 Winner!


I wrote out all the happy names from all my sources and popped them into a happy orange colander...here ya go...


Congratulations, Zombie Queen! 

Monday, July 8, 2013

Sewing School 2: review and a giveaway

I am thrilled to be a part of the Sewing School 2 by Amie Petronis Plumley and Andria Lisle blog tour! **To be included with such inspiring blogs such as Red Bird Crafts, The Crafty Crow, and maya*made has me doing a happy dance and the timing couldn't have been more perfect as I had a crafty day all set up with Miss Za of the adventures of ander and zaza.


Sewing School 2 is a delightful book. The projects within are simple and adaptable with instructions that greatly helped even me (I am a wonky sewer at best). The envelope of patterns in the back keeps all the pieces within reach and the photos by Justin Fox Burns are so eye catching that Za and I peered through the book many times over making grand plans as to what would be created on our crafty date. 


Miss Za has her own sewing machine at home so we skipped over the basics covered in the first few chapters (though I did go back and read on my own and found them to be super helpful for beginning sewers; zippers now seem doable!) and went straight to the projects. Though many caught our eye (the Sleepy Bear, and Stripy Quilt to name two),  Za decided she wanted to stitch up her very own bag and so we turned to the ehold project and gave it a read through.

Our main fabric had a pattern going  in a direction that would not work with the pattern and so I quickly stitched up a larger swath of fabric for Za to use in her bag making. Because we only had a half yard of the owl fabric Miss Za really wanted to use and because direction the owls faced on the half yard prevented up from creating the bag as described, we sat down and did another read through and some strategic planning.

Za was going to use her bag for everyday use and so we opted out of the batting but we did find a large piece of fabric in my stash that would work as a lining and so after a good pressing of seams on the larger patchwork piece we were good to go.

After cutting out the pattern, Za pinned it to her fabrics (we had a long talk about why we face the right sides together) and cut them out. The sewing machine was mostly ready, all we needed to do was select the thread. Za placed one corner of her soon-to-be bag under the needle and foot and got to sewing, remembering to do a back stitch and keeping her needle down for turning corners (the colored TIP boxes on each page  were super helpful ). 


After stitching, Za removed all her pins and turned her fabric right side out. She was able to refer to the book for each step. We closed up the open seam and decided on where the top part of the bag would fold over the bottom and it was back to the sewing machine. Though we did not do an exact ehold, we made use of the instructions, design, and pattern that were all there. From start to finish this bag took us a little over two hours including a trip back to the craft store to pick up ribbon for the strap. We even had some time to create a few Tag Alongs!


Back home, Miss Za has been using her bag daily and is quite proud of all the work she put in it. I really enjoyed having my basic sewing needs answered in one lovely book. I also see quite a few plush microphones and guitars in my future (the children at the preschool are gonna love them!)

If you are in the U.S. and would like an opportunity to win your very own copy of Sewing School 2 please leave me a comment here with your contact info or leave a message and like scrumdilly-do's facebook page and I will choose a winner on Wednesday, July 31st. Happy sewing and don't forget to visit each blog on the tour!


Don't miss the rest of the tour for more chances of winning your own copy:

July 8:  scrumdilly-do!
July 11: Windy Lou
July 13: Improv Diary
July 17: Teach Beside Me
July 19: The Crafty Crow
July 21: Such Designs
July 22: Red Bird Crafts
July 23: The Long Thread
July 25: maya*made

**{For this post, I received a copy of Sewing School 2 to review and a copy to offer in a giveaway.  All opinions  and photos other than the cover presented in this post are my own.}

Wednesday, July 3, 2013

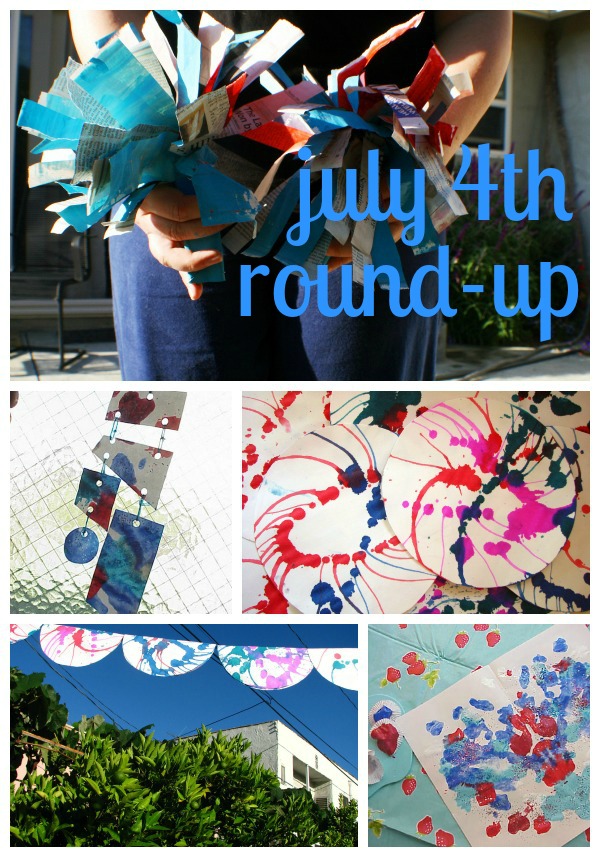
make faux tie-dyed paper flags

 
Here's another project that was inspired by pinterest. There are quite a few pins (and thus, blog posts and videos even) out there relating to this so I cannot attribute it to a single person. Oh and it was also at the San Mateo Maker Faire so there ya go.

 For this project you will need paper, scissors, permanent markers, rubbing alcohol, masking tape, straws or pencils, and either a small misting bottle, ear swap, or eye dropper.
 
Set up in a mess friendly area. I used a vinyl tablecloth with a large sheet of wax paper on top.  To create eight flags you will need a single sheet of white paper 11"X17". You can also use index cards or smaller sheets of paper but I wanted to use a large sheet to get your kiddos into paper folding and cutting on a line. Have your kiddo fold their paper so that they have eight squares. Hand them a pair of scissors and have them cut long the folded lines.
Gather up your permanent markers and get to creating a happy flag. The more marker lines you add, the more blended and colorful your flag will be.
 
Now it is time to add the rubbing alcohol. It goes without saying that you should not leave your child alone while working on this project. The alcohol is a bit intense in scent but so are the markers. It also looks a lot like water so make sure you use a very small container to hold it and never leave your child unattended. The more alcohol that is dripped and dribbled onto the paper, the more it will spread and fade. If you wish for a brighter result, use a cotton swap to "draw" the alcohol onto the marker lines. A fine mister bottle would work as well for older children. Set aside to dry.
 
Once dry, use tape or glue to attach a straw or pencil to the back to create a handle. Ta-da! Fun flags you can wave at your very own Fourth of July parade! Omit the pencils and straws and you cn turn this into a garland by gluing or taping to a couple yards of ribbon.


Tuesday, July 2, 2013

spin some fourth of july art


This nifty doohickey was made from egg carton pieces and beads. Add a bell or two and you can call it a wind chime!

Back in 2009 I shared with you my fondness for spin art. This year I discovered this awesome idea from Not So SAHM via pinterest. I thought the idea of using egg cartons in the salad spinner was brilliant and tucked it away in the noggin for a Fourth of July project. The only problem was I no longer had a salad spinner and so I kept my eyes peeled for one at the thrifts and scored this basic model for $3.25! Cutting it quite close to the wire, I managed to actualize what I visualized and now I have a diy for you!

Materials:
*salad spinner
*egg carton cups
*acrylic, tempera, or biocolor paint
*embroidery thread
*fat needle
*assorted beads
*scissors

The first thing you need to do is liberate your cups from a paper egg carton. This is not a kiddo project as the pulp from the egg carton is a bit wonky to cut. Keep this part for the grown-ups. Sharp scissors work best.
Place egg carton pieces into your salad spinner and add paint. Your kiddos can easily do this and will thoroughly love squirting the paint on top of the egg carton pieces.
Place lid on spinner and have your kiddo give it a whirl or two. There are at least three different styles of salad spinners out there. We use all three at the preschool I work at as each of them offer different challenges to children. Keep this in mind when hunting for a salad spinner. Will your child be able to turn, pump, or pull the mechanism? For toddlers we use a pump model. The pre-k children love the pull model and the threes like to crank away.
Set aside the egg cartons to dry.
While the paint is drying, have your child sort out red, white, and blue beads from your assortment.
When paint is dry, thread a needle with a longish length of embroidery thread. Double the thread and knit it. This will keep the needle from slipping off (I did not double my thread and lost my needle twice).
Begin adding beads. You can ask your child to count out and thread a specific number of beads to practice counting or let them create patterns as they thread away. After they have threaded a series of beads it is time to poke the needle through an egg carton piece. Poke the needle up through the inside of the cup so that the cup faces down over the beads. Add more beads, then another egg carton cup, then more beads, repeating until your child has their desired number of cups and beads on their thread.  Tie of thread into a loop and use scissors to cut off any excess.
 
 
Hang in a happy place and watch it blow around in the breeze. Add bells to the bottom before beading to create a wind chime of sorts.

Happy-almost-fourth!


make a paper napkin garland


To create a fun, festive garland all you need to do is glue your napkins to a a few yards of ribbon in an ABAB pattern, allow to dry, then hang! To conserve napkin use, cut your napkins in half before gluing. Have fun!
Monday, July 1, 2013

last minute july 4th decor your kiddos can make!


All you need to create a fun garland and these medallions is a couple of packs of holiday festive paper napkins!

materials:
*three paper napkins
*scissors
*glue stick
*yarn
*ribbon
*white glue
I found my napkins at Target on sale. I had been eyeballing them for a while and was pleased to find them discounted. Party stores may also be a good source for holiday themed napkins. Open napkin so that it is a rectangle shape, cut in half. Kiddos can practice their cutting skills while doing this.
Next, accordion fold each rectangle up from the bottom, about four folds. Fold in half to create a fan shape. Draw a line of glue with a gluestick on one end of your folded napkin and adhere to the other.
You will need three napkins per medallion (that's six small fan shapes) so repeat the cut and fold process three times. Use glue stick to glue all edges together to create a circle.
Give your finished medallion a small snip with your scissors (a hole punch will not work) and thread with a length of yarn that can be doubled and knotted for easier hanging.

That's it! You can also use paper for this project easy peasy.


Sunday, June 30, 2013

make a popcorn bag garland


This is a fun project I posted at scrumdillydilly. Switch out the sewing machine and add some glue, washi tape, and/or staples and your kiddos can create one just as nifty!

Saturday, June 29, 2013

kickstarter: inventing kindergarten


Here's a kickstarter project I urge you to look into. Inventing Kindergarten by Norman Brosterman is one of my most favorite books. It is what clued me in to Frederich Froebel and turned my education focus towards child development and progressive education. The problems that Froebel saw in education 176 years ago have not strayed too far from today's issues. His educational philosophy has had a direct influence on some of our most innovative people in our recent history; Frank Lloyd Wright, Richard Feynman, and Paul Klee to name a few. It is Froebel who brought us building blocks and paper weaving. It is Froebel who made the connection between children and nature, and it is Froebel who demonstrated the concrete learning children obtain from play.

"Play is the highest expression of human development in childhood for it alone is the free expression of what is in a child's soul."

 I am so grateful to Norman Brosterman for writing such a lovely book and am doubly grateful I was able to purchase it the fist time around. When my hardcover copy went missing, I was relieved to find a used one in paperback but those copies are now few and far between. I am proud to say I am able to contribute to this kickstarter fund and encourage you to take a look and see if it interests you. There are only a few days left and he is sadly far from his goal, perhaps we can make a difference and get this book republished. If you have an opportunity to do so, please do and if you have an opportunity to read it, yes, please do! It is that good!

Wednesday, June 26, 2013

make a memory catcher


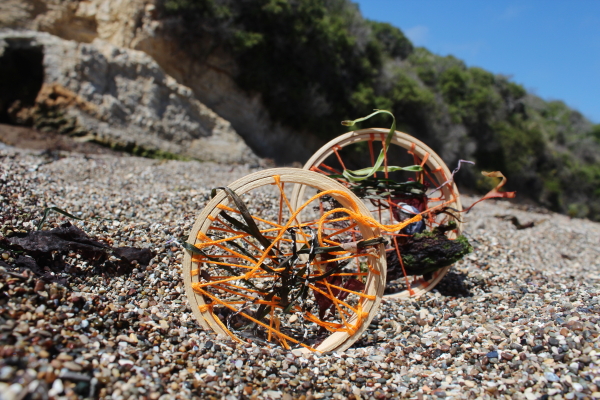
When ander and zaza were visiting we hit up our favorite beach for some rock collecting, climbing, creek walking, and of course...crafting.
We decided to call these mini weavings memory catchers as a cross between a dream catcher and a memory jar. To create your own all you need is a mini embroidery hoop, embroidery floss, and scissors.

Wrap a long length of embroidery floss around the inside hoop making sure to cross over multiple times. Because the hoop is round, you will want to anchor your wrappings but doing a double wrap every now and then (wrapping your floss around the rim of the hoop twice before stretching it across to the other  side), otherwise your floss will slip and your nice spider-webby pattern will just be a jumble of floss.
 
Tie on with a knot and end with a knot. Don't worry about excess thread, it kinda looks happy dangling along with your memory bits. If you prefer, use your scissors to trim the tails. Once your ending knot is secure, anchor the outside hoop over the webbed-up hoop and tighten. Now it is time for some weaving of sorts.
 
The more wrapping and webbiness you add to your hoop, the more non-linear items can be added. You can weave long strands of seaweed in and out of the crossing threads or you can poke and coax smaller pieces of wavy seaweed and pebbles in between the threads.
When you wrap your thread around the hoop, you will be wrapping on both sides creating a bit of a pocket between the threads to tuck non-weavable items into.
There you go, a little memory catcher to remind you of your day by the ocean...or in the forest...or at the lake. Try weaving flower petals and different grasses, or small ferns and happy leaves. Just make sure to stay away from poison oak and ivy and if you are in a protected area, take a picture instead and preserve the prettiness.

Sunday, June 23, 2013

adventures with ander and zaza: an impromptu pom pom factory


This past week ander and zaza came for a visit. I had made a pom pom wreath for the 4th of July and zaza asked how I made all those pom poms. Out came the yarn and scissors and the next thing I knew we were in pom pom city. It was pom making all the time. There were pom poms here, and pom poms there, here a pom, there a pom...you get the picture. It was also a complete blast! Here are some things we learned...
 
 
Pom pom making with younger folks is really easy even without a pom maker (it's also easily portable). I demonstrated the HANDmade technique maybe two or three times and the children were off and running. We had to make a special trip to the craft store to bulk up on lovely yarny goodness.
The most difficult part seems to be tying the yarn around the center of the pom-to-be tight enough so that the snipped yarny bits don't slip away. The color choosing and wrapping went by lickety split.  We began by wrapping up our little pom packages until we had a happy pile and then we went to trimming them. The little packages were just as pretty as the poms themselves.
If your child is having trouble wrapping around their hand, they can use a tp tube, piece of cardboard, and/or a wooden spoon or spatula. We tried most of them and learned that a too tight wrap didn't exactly like to slide off the utensil it was hugging. Oh, and for a smaller pom, use two fingers for wrapping instead of four.
 
We also learned that if you wrapped three or four colors around at the same time, your pom-to-be bulked up quicker and displayed a lovely confetti effect. Even more so if one of the yarns was variegated. It was also a lot easier to wrap directly from the skein of yarn. The kitchen floor was covered in happy skeins and sometimes they got tangled but they tangled up a lot less than if we cut out yards of yarn before wrapping.
 
 
First timers can trim their poms just a little, creating a shaggy bit of pom happy. As your kiddo gets more practice and used to the trimming aspect of pom pom making, they can snip away to create a trim ball of happy. Fabric scissors work best and yes, they do look alarmingly long when in the hands of a kiddo. Our mantra to the kiddos as they got all snip happy was to think of their pom as a bonsai tree. Snip just a little at first and trim as you go. Their first round of poms were happy shaggy bits but as they became pom pom masters they trimmed them up tight. I think they even went back to their first poms and trimmed those down as well.
 
There is a lot of yarn waste when making pom poms. Use a large tray or plate to catch all the bits that fall. We saved the trimmings in big plastic bags for a future project. There are a few ideas and maybe they will get made, we'll see.
Not sure what we are going to do with all the poms but we did discover that berry baskets make excellent pom pom vessels.