Showing posts with label repurposing. Show all posts

Tuesday, July 2, 2013

spin some fourth of july art


This nifty doohickey was made from egg carton pieces and beads. Add a bell or two and you can call it a wind chime!

Back in 2009 I shared with you my fondness for spin art. This year I discovered this awesome idea from Not So SAHM via pinterest. I thought the idea of using egg cartons in the salad spinner was brilliant and tucked it away in the noggin for a Fourth of July project. The only problem was I no longer had a salad spinner and so I kept my eyes peeled for one at the thrifts and scored this basic model for $3.25! Cutting it quite close to the wire, I managed to actualize what I visualized and now I have a diy for you!

Materials:
*salad spinner
*egg carton cups
*acrylic, tempera, or biocolor paint
*embroidery thread
*fat needle
*assorted beads
*scissors

The first thing you need to do is liberate your cups from a paper egg carton. This is not a kiddo project as the pulp from the egg carton is a bit wonky to cut. Keep this part for the grown-ups. Sharp scissors work best.
Place egg carton pieces into your salad spinner and add paint. Your kiddos can easily do this and will thoroughly love squirting the paint on top of the egg carton pieces.
Place lid on spinner and have your kiddo give it a whirl or two. There are at least three different styles of salad spinners out there. We use all three at the preschool I work at as each of them offer different challenges to children. Keep this in mind when hunting for a salad spinner. Will your child be able to turn, pump, or pull the mechanism? For toddlers we use a pump model. The pre-k children love the pull model and the threes like to crank away.
Set aside the egg cartons to dry.
While the paint is drying, have your child sort out red, white, and blue beads from your assortment.
When paint is dry, thread a needle with a longish length of embroidery thread. Double the thread and knit it. This will keep the needle from slipping off (I did not double my thread and lost my needle twice).
Begin adding beads. You can ask your child to count out and thread a specific number of beads to practice counting or let them create patterns as they thread away. After they have threaded a series of beads it is time to poke the needle through an egg carton piece. Poke the needle up through the inside of the cup so that the cup faces down over the beads. Add more beads, then another egg carton cup, then more beads, repeating until your child has their desired number of cups and beads on their thread.  Tie of thread into a loop and use scissors to cut off any excess.
 
 
Hang in a happy place and watch it blow around in the breeze. Add bells to the bottom before beading to create a wind chime of sorts.

Happy-almost-fourth!


Friday, December 7, 2012

make a dreidel garland

Have any neckties up for grabs? Turn those bits of swanky silk into a nifty dreidel garland. This fun project is easily created with scissors and glue. Here's what ya need:

Dreidel Garland
*eight neckties (old or thrifted)
*scissors
*tacky glue
*clothespins
*ribbon
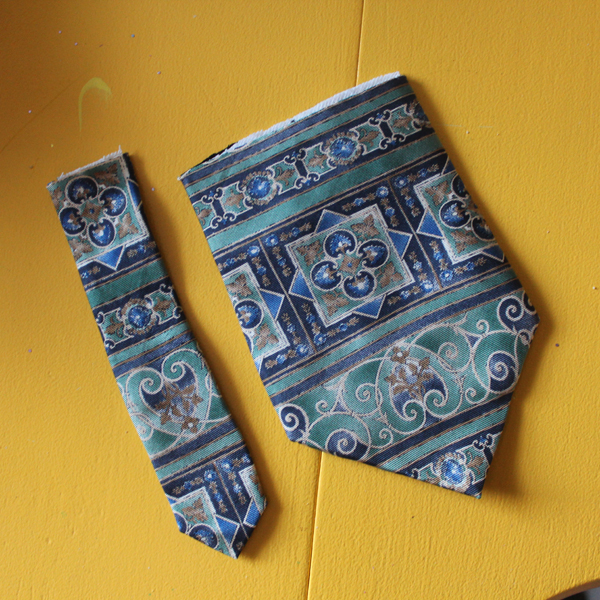
 Gather up your neckties. I used eight to celebrate each day of Hanukkah but you can choose to use more or less. A single necktie would make a lovely dreidel decoration that can be hung on a doorknob or wall. I collected my neckties from various friends and thrift stores.  If your child is on the wee side (say younger than eight) you will want to cut the fat end of each necktie away from the rest. About eight inches is a good measure. If your child is scissors capable, they can cut off the skinny end of each tie about six inches long. If you wish to add some math fun to the mix, have them use a ruler to measure and a piece of chalk for marking. Mark on the back part of the tie in case the chalk decides to linger. 
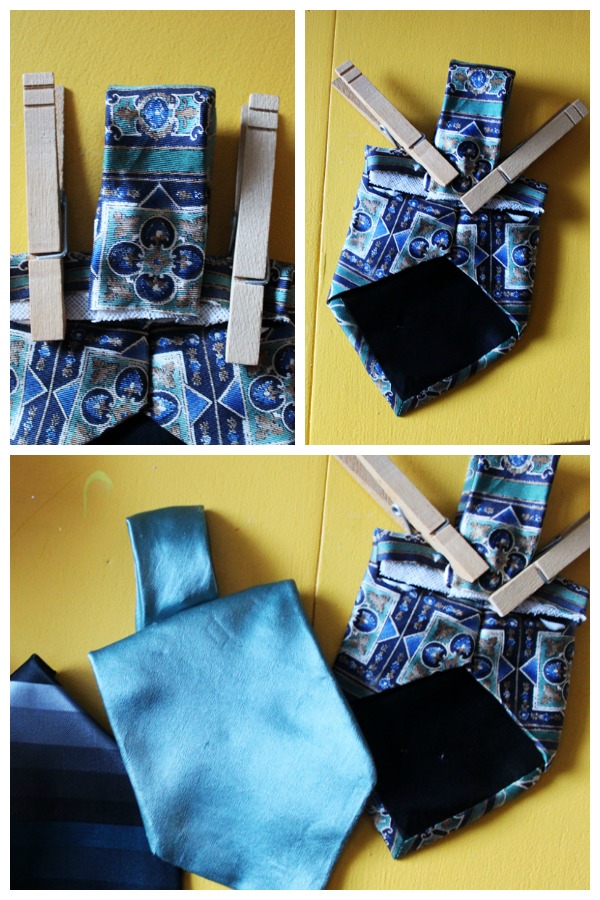
Flip each large tie piece over and have your child draw a line of glue along the top cut edge. Tacky glue works best but you can use good old fashioned school glue as well. If you liberated the fat end of the tie before the simple stitch that holds all the folds in place you may wish to add a dab of glue or so to the folds as well. Once the glue is along the cut end, carefully fold the edge over and use a pair of clothespin to anchor until the gue dries. All those layers of silk and such will want to pop away from the glue so don't forget the clothespins. If you do not have clothespins, use a sheet of wax paper on top of the glued bits and plop a large book or two on top until dry.
 After all of the now almost-dreidel shapes have been glued it is time to make the dreidel tops. Pick up a cut skinny end, draw a line of glue along the cut end and fold over but not all the way to the edge. Next, add a blob of glue along the new bottom, flip over and center onto the back of the dreidel shapes. Rearrange the cothespins to anchor down the tops and set aside to dry.
 Once dry, cut a length of ribbon and thread each dreidel onto it. Hang in a happy place and enjoy! 

Friday, June 3, 2011

crafting for craft: make a play camera

This one is for your kiddos! check out the craftzine blog for the tutorial. I'll be back on Tuesday to add a proper link. Happy crafting!

Friday, September 17, 2010

make a placemat tool belt

my mister & i were attending a shindig for a young miss who had, amongst other things, asked for tools for her birthday. i culled through my fabric stash and picked up an additional bit and pleaded with my mister to make her birthday wish come true. he is much better at three dimensional sculpture than i am. he hammered out, if you will, a most marvelous trio of tools per my design (wink wink). for my part, i whipped up a tool belt so that the young miss may have her tools at the ready for you never know when a princess (or a pirate) needs to fix something (like a bouncy house). it was easy-peasy, check it out.to make a tool belt you will need:
*placemat
*needle & thread (or sewing machine)
*pins
*ribbon
*velcro
*scissors
*scrap fabric

scrumdilly-do it:

the first thing i did was sew a fun little patch of fabric onto the top end of the place mat. or rather, the top end of the back side. place placemat in front of you horizontally, wrong side up. pin scrap of fabric to top right corner and stitch on using a zigzag stitch. this is for decoration only so you can add as many patches of color as you like or you can leave it alone and add none. next up i used a small straight stitch on the machine to affix a length of velcro from one end to the other. the velcro strip overlaps the fabric patch. the other half of the velcro is attached to the tools. if you are choosing to add velcro, make sure you have the right tack attached to the tools otherwise they won't stick and what fun would that be?flip placemat over with velcro and patch closest to you. fold up to about two inches from the top and pin in place. determine the center of your place mat and stitch from bottom of fold to a little past the edge.with placemat now tacked into a fold, line up edges on the right side using the corner of the mat. now, bring corner towards the center of the mat so that the top corner now lines up with the top of the mat. pin into place and repeat for other side. this is so the pockets have room for extra toys and/or the tools themselves.gather your ribbon and cut into two lengths at least ten inches long, there will be an excess of ribbon but you will want to tie it around your kidlet's waist securely. most placemats run about 19" across. you can trim after your final fitting. Pin ribbon to placemat under the diagonal folds you just pinned. stitch along the diagonal edge of the placemat keeping sure to catch the ribbon end so that is is anchored to the new belt.remove pins, trim ribbon edges, affix tools, tie on and enjoy!


*if you do not have a set of plush tools or do not feel up to making them, you can glue velcro onto light plastic toys and they too will stick to the belt.