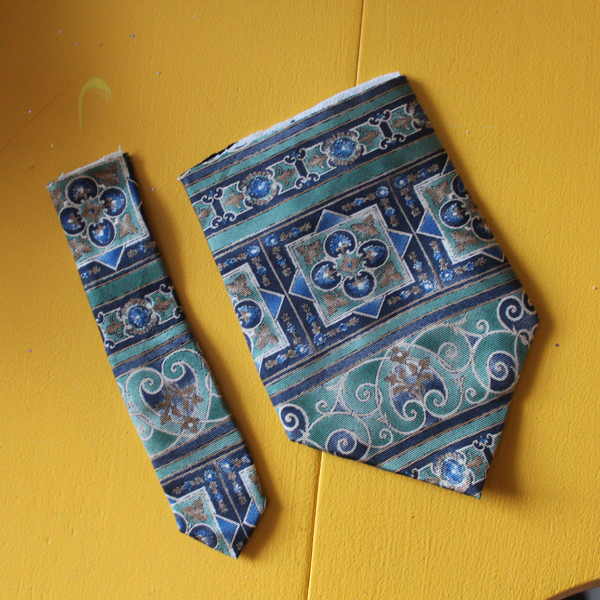
Have any neckties up for grabs? Turn those bits of swanky silk into a nifty dreidel garland. This fun project is easily created with scissors and glue. Here's what ya need:
Dreidel Garland
*eight neckties (old or thrifted)
*scissors
*tacky glue
*clothespins
*ribbon
Gather up your neckties. I used eight to celebrate each day of Hanukkah but you can choose to use more or less. A single necktie would make a lovely dreidel decoration that can be hung on a doorknob or wall. I collected my neckties from various friends and thrift stores. If your child is on the wee side (say younger than eight) you will want to cut the fat end of each necktie away from the rest. About eight inches is a good measure. If your child is scissors capable, they can cut off the skinny end of each tie about six inches long. If you wish to add some math fun to the mix, have them use a ruler to measure and a piece of chalk for marking. Mark on the back part of the tie in case the chalk decides to linger.
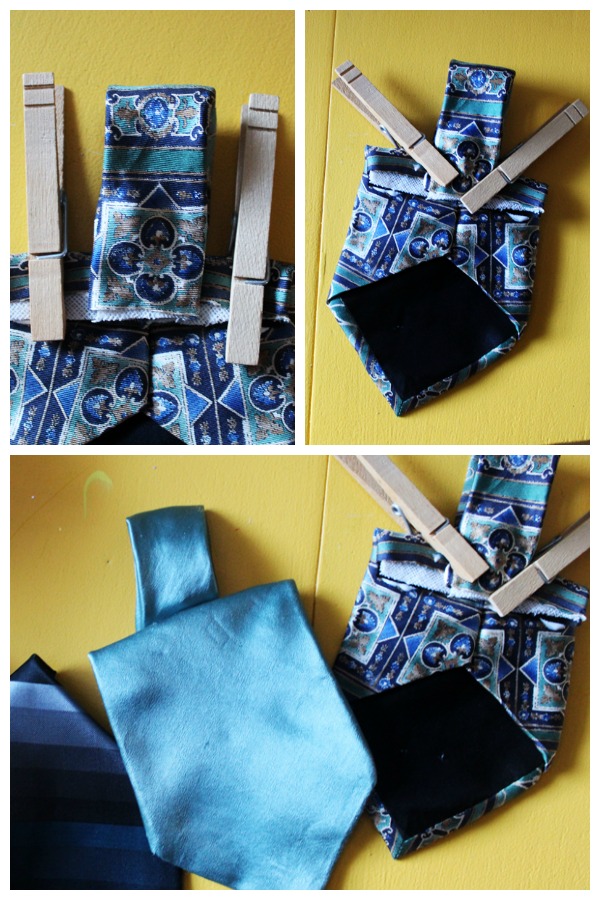
Flip each large tie piece over and have your child draw a line of glue along the top cut edge. Tacky glue works best but you can use good old fashioned school glue as well. If you liberated the fat end of the tie before the simple stitch that holds all the folds in place you may wish to add a dab of glue or so to the folds as well. Once the glue is along the cut end, carefully fold the edge over and use a pair of clothespin to anchor until the gue dries. All those layers of silk and such will want to pop away from the glue so don't forget the clothespins. If you do not have clothespins, use a sheet of wax paper on top of the glued bits and plop a large book or two on top until dry.
After all of the now almost-dreidel shapes have been glued it is time to make the dreidel tops. Pick up a cut skinny end, draw a line of glue along the cut end and fold over but not all the way to the edge. Next, add a blob of glue along the new bottom, flip over and center onto the back of the dreidel shapes. Rearrange the cothespins to anchor down the tops and set aside to dry.
After all of the now almost-dreidel shapes have been glued it is time to make the dreidel tops. Pick up a cut skinny end, draw a line of glue along the cut end and fold over but not all the way to the edge. Next, add a blob of glue along the new bottom, flip over and center onto the back of the dreidel shapes. Rearrange the cothespins to anchor down the tops and set aside to dry.
Once dry, cut a length of ribbon and thread each dreidel onto it. Hang in a happy place and enjoy!


So clever, jek!
ReplyDeleteThis is so creative! Thanks for the idea!
ReplyDelete