Friday, March 16, 2012

make crepe tissue rainbows

 For this project, we're going a little old school by wrapping small squares of tissue around the eraser-end of a pencil. To update it, we're using crepe paper streamers instead, they are much easier to cut into small squares. So easy, your kiddos can even do it!

Materials
*crepe paper streamers in rainbow colors
*large yogurt lids or other round bases
*white glue
*pencil with eraser-end
*hole punch
*cotton balls
*yarn or string
Gather up your supplies and have your kiddos cut long strips of streamer into smallish squares.
 Use a hole punch to punch a hole out of your yogurt lid. I like using yogurt container lids as they are a smidge larger than small but not so large, children lose interest in filling them. You can also use cardboard or sturdy paper cut into circles but the lip on the lids will corral all that sticky glue.
 
Squirt a happy amount of glue inside the lid and have your kiddos use their fingers to spread it around. Some lids may resist the glue, you can sand down the surface with a bit of sand paper if you like. This will help the whole thing stick better and last longer.
 
To create a rainbow, have your kiddos wrap a red square of tissue around the eraser of the pencil. Next, while the tissue is still wrapped, flip pencil over and push it against the glue filled lid. Slowly pull the pencil away from the tissue and you will leave behind a happy tissue flair. Repeat with the red and arc across the top part of the lid creating a rainbow shape.
Continue with each color in rainbow order (or not). Notice how each arc grows smaller and smaller? Dialogue with your kiddos and see what observations they make.
 
After the last arc is in place. Give your kiddo a cotton ball to tear into smaller pieces. Place the cotton "cloud" at the bottom of the rainbow and set side to dry.
Once dry, loop a length of ribbon, yarn or string, through the hole-punched hole and hang in a happy place!You can also let your kiddo glue their rainnbow squares however they like to create a happy party of color!

Thursday, March 15, 2012

shamrockin' pop corn!

 Making a snack for St. Patrick's Day is pretty easy. All you need to do is fill up on green things. Here all you need is some popped popcorn. I would recommend fresh popped but used a microwavable bag for the photo and an assortment of green candies. It's the whole salty sweet thing that wins here.
 Have your kiddos wash up their hands and ask them to sort a bowl full of treats. All the green goodies go into the green bowl. Here we have Easter m&ms, mini m&ms, & sixlets.

Add a healthy does of mini marshmallows for variety. And mix it all into the popped popcorn. If the popcorn is warm, all the better. The marshmallows and chocolate bits will melt a smidge, boosting the flavor up a notch or two.
 If you are serving to the grown-ups in the group or perhaps some teens or an adventurous kiddo or two, add a handful of HOT wasabi peas. Be careful of the brand I used up there. Those little green things are HOT HOT HOT!
 Enjoy!

Tuesday, March 13, 2012

make an animal parade

This project is super simple and just as tasty. Older kiddos can whip up a whole batch mostly by themselves. Younger kiddos can stir the melts and add the sprinkles Kiddos of all ages can eat them up! I made them green with rainbow sprinkles for St. Patrick's Day, but you can use any color you choose.

*1 pack of green candy melts
*animal crackers or cookies 
*sprinkles
*wax paper
*cookie sheet
*two forks
*heat proof bowl
 
Candy melts are super easy to melt in the microwave. If you choose not to microwave or do not have one, you can melt the candy using a double broiler or heat proof bowl over a saucepan. The green melts are kinda dark so if you want a lighter green you can try the white melts with a drop or two of food color mixed in.
Once your candy is melted, drop an animal cracker or two into the melty goo until coated. In my house, we really like these animal crackers. Use one fork to lift the cookie up from the melty mess. Tap the fork against the edge of the bowl so that the excess candy drips off the cookie. Use the other fork to gently nudge the cookie onto the cookie sheet lined with wax or parchment paper.
Add sprinkles. Don't wait too long for this step. The candy hardens quicker than you think. I waited too long, so my first four or so cookies are sprinkle-free.
Allow cookies to harden, place in a happy bowl and enjoy with a glass of your favorite milk drink!

Thursday, March 8, 2012

make a happy rainbow to hang!

This is actually a happy garland the grown-up will need to assemble unless you go the staple route which kiddos LOVE. The measuring, folding and painting parts can all be done by your child. The DIY  can be found at scrumdillydilly.

Tuesday, February 28, 2012

Purple Cake Day!

 Purple Cake Day is this week so we're in a whirl of purple at the school. Setting up art projects and centers within a theme is always a fun thing. You can make old things seem knew simply by switching up the colors or materials. 
Grape, vanilla and lavender scented play dough is perfect for cake making.
 A puppet theater becomes a cake stand. 
 
The water table is filled with collage materials in purple and makes for a great mess!
We've been mixing purple and painting with purple. Our flags of hope are decorating the classrooms and the children are learning about Nepal. 

To learn more about Purple Cake Day, click here.


Saturday, February 25, 2012

Who Needs Blocks to Build?

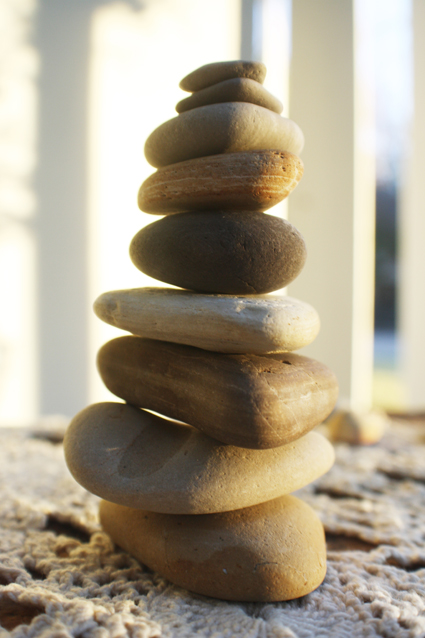
 Last week I was hanging out with a couple of four-year-olds as they dumped over a bin of blocks. To accompany the blocks, they also had a container of river rocks. Some smooth, some lumpy, some large and some small. The usual block structures were immediately assembled topped off with rocks for decoration. The children asked me to build with them so I wondered out loud if the rocks could be used to make a tower or structure.
  One young girl took two rocks and placed them atop each other and exclaimed that they could. I asked how many did she think she could stack. She tried to add a third, much larger and lumpy, to the top of the two and it all tumbled apart. She tried to restack with the same results and eventually she figured out the balance of larger rocks on the bottom.
 Rocks went up and tumbled down over and over as she grew frustrated and excited at the same time. Soon enough she called my name and pointed in excitement at her eight-rock-tall tower. Eyes all wide and mouth all smiles she clapped and said "I did it!" I said that I could see that she used her focus to build her tower. I wondered out loud if I could build a tower like that and picked up a small rock and placed it in front of me. I then added a larger rock followed by an even larger rock and the whole thing slip-slid apart. The young girl then told me that I should start with a larger rock. She said that she found a pattern (we talk a lot about patterns)..."biggest to smallest!" is what she said and then she informed me that the flat rocks worked better, the lumpy bumpy rocks were too bumpy, as she waggled her hands about to illustrate her point. Together we built another tower with much hoopla and giggles as I handed her rocks to large or too bumpy. Each time she would repeat why they wouldn't work and I smiled because this discovery would not have happened had we stuck with the uniform blocks from the bin.
*I did not have my camera with me so all pictures are from my own rock collection and adventuring. Block building and other stacking items are instrumental in teaching children math and science concepts. Be they large or small, flat, uniform or crazy shaped, there is much a child will learn through block play and stacking toys. If there is one investment to make towards your child's toybox, I would recommend blocks. You are never too old for blocks!

Friday, February 24, 2012

Spots & Dots

 The three year old class at the school I work at read a book about a snow leopard. After a discussion about the leopard and the story, their teacher had them sit down to paint up their very own leopards. Each child received a small container of black paint and a cut out leopard shape. Now, I know this is far from an open ended art experience but as a lesson in listening and observation it was quite interesting to spy upon these small artists as they spotted up their animals.
If you are lucky enough to work closely with a group of children you will notice patterns of behavior and reflections of their development manifesting in pretty much everything they approach. We have one young one who is often the one so full of energy and humor I struggle to not let exasperation or full on laughter burst forth when I am around them but who, when it comes to a focused task, will sit the longest and follow through and dialogue as they are working in such a charming way. This one, took their time with their small pointed paintbrush and covered their leopard with the tiniest of spots from head to tail.
Another child filled their leopard with black paint so not a spot could be seen while another, a very focused artist who I thoroughly enjoy watching began like the rest but found that at a certain angle, their brush made delicate, feathery marks and proceeded to gracefully fill their leopard with flittery-fluttery spots.
Tiny spots, enormous spots, spots jabbed out lickety-split and wily-nily covered their paper leopards every-which-way. Not one was the same yet they used the same tools. While child-driven and open-ended art are my go-tos, there is something to be said for a follow-the-instructions kind of process. Take a silent seat, listen carefully and watch the magic unfold. It's all in the details.

Monday, February 6, 2012

be my valentine: irresistable

 Here is a lovely watercolor, crayon resist you and your kiddos can whip up in no time. All you need is painter's tape, heavy paper (water color paper works best), a white crayon or oil pastel and watercolors.
Mask out a square with your painter's tape. Have your kiddo cover their paper with drawn hearts using the white crayon or draw some hearts for your kiddo. Have your kiddo paint on water to dampen the paper and let them go to town with their paint. Stick with one color or limit your kiddo's palette to two or three that wil mix happily when they run into each other. 
Set aside to dry, remove tape and hang!

Thursday, February 2, 2012

be my valentine: red velvet cake mix shortbread

 Recipe over on scrumdillydilly!

be my valentine: i only have eyes for you

If you've got glue and googly eyes, yer good to go. Hand your kiddo some markers or crayons first to decorate their blank cards, have them sign the back then let them get all glue happy. Set aside to dry and have fun!


Wednesday, February 1, 2012

be my valentine: blended strawberry milk

This is a super tasty blended drink that I actually enjoy more than a milkshake! This recipe blends up two small servings and has very little added sugar. You can sweeten it up if you like it is pretty adaptable.

Ingredients:
*1/2 cup milk
*1/2 cup frozen strawberries
*1/2 teaspoon vanilla or 2 tablespoons Ovaltine
*blender
*whipped cream and sprinkles (optional)
 
 
Blend milk and strawberries in a blender until smooth. For a vanilla blend, add vanilla and a smidge of sugar if you like. For chocolate, add the Ovaltine. Pour into fancy glasses and top with a dollop of whipped cream. Add a smattering of sprinkles, pop a happy straw into the mix and enjoy!